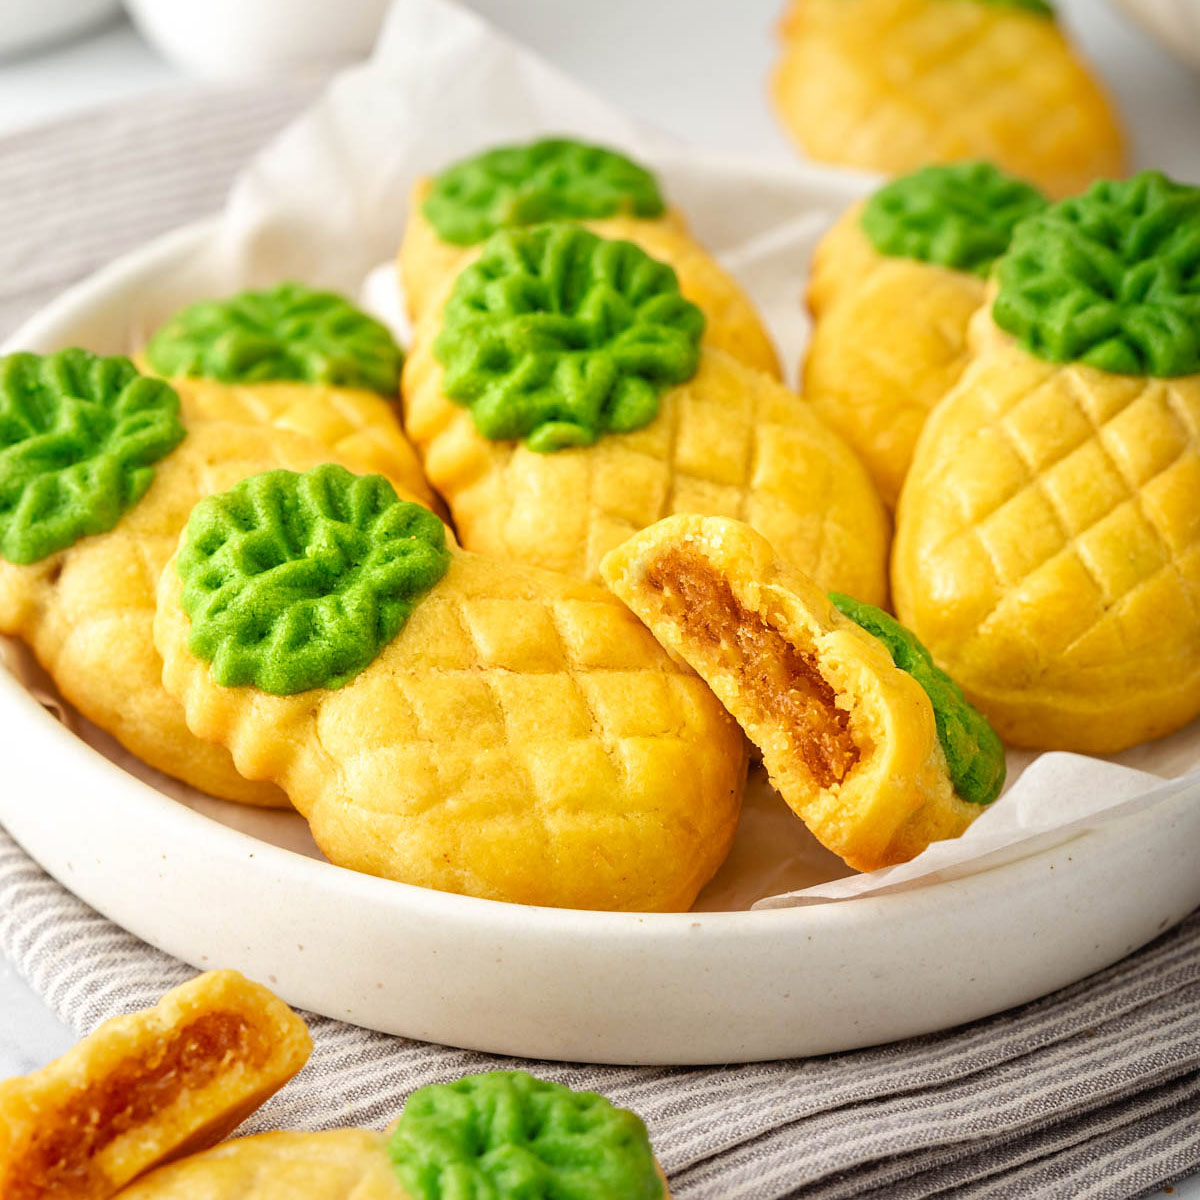
One bite into these pineapple tarts and you are greeted with a sweet and savory crumbly pastry that highlights a tropical, tangy pineapple spiced jam filling. These popular Lunar New Year treats are perfect for bringing good luck all year round!
One bite into these melt in your mouth pineapple tarts and you are instantly greeted with a sweet and savory crumbly pastry that highlights a tropical, tangy pineapple spiced jam filling. These popular Lunar New Year treats are perfect for bringing good luck and prosperity all year round!
I know that pineapple tarts are traditionally made the most often during Lunar New Year but in Southern California, it’s PINEAPPLE SEASON. These melt-in-your-mouth pineapple tarts are my family’s all-time favorite pineapple dessert so naturally, I had to make them. They may seem like an impossible feat but trust me, once you taste that buttery and crumbly shortbread paired with a filling bursting with pineapple flavor you will instantly forget how long it took to make them. Pair this with a refreshing brown sugar milk tea and you have got yourself the best pick-me-up snack.
Why are pineapple tarts eaten during Lunar New Year?
In Hokkien and Cantonese, pineapple is called “ong lai”, which literally translates to “fortune come.” Pineapples are seen as a sign of good fortune, wealth, and prosperity. Pineapple tarts have become ubiquitous during the Lunar New Year because they are normally given as gifts to friends and family for good luck in the New Year.
What is in a pineapple tart?
A pineapple tart is made up of two different delicious parts 1) the pineapple jam and 2) the crumbly buttery shortbread pastry. Together they may be a labor of love to create from scratch but they are heavenly treats that are 100% worth it every time.
The pineapple jam is made up of fresh (or canned) pineapple that is reduced in cinnamon and sugar. Many recipes call for draining the pineapple juices for a quicker jam, but I think that slowly reducing the pineapple with the juices provides a deeper richer pineapple flavor. The final texture of the jam will be quite firm and will hold together when pressed along the side of the saucepan.
The pastry is sweet, savory, and instantly melts in your mouth. The key part of the pastry is the savory bit. Other recipes may call for salted egg yolk or parmesan cheese but I opted for cream cheese for a more subtle savory flavor.
Ingredients
Pineapple: you can either use fresh pineapple or canned pineapple. I found that fresh pineapple always yielded the best-tasting results.
Cinnamon: cinnamon adds that extra spice to the pineapple jam. You can also steep a tea bag with star anise, cloves, and cardamom pods if you want extra spice.
Granulated sugar: the granulated sugar caramelizes the pineapple and gives it that sticky workable texture.
Maltose: the maltose gives the jam the density and chewiness and assists in caramelization. You can substitute maltose with honey, or brown sugar but it will not be as sticky and easy to work with. You can find maltose online on Amazon.
Unsalted Butter and Salted butter: the unsalted butter is for the jam whereas the salted butter is for the pastry
Vanilla: adds a subtle sweetness to the tart.
Cream cheese: the cream cheese adds a subtle savory note that we all love and crave. You won’t be able to outright taste the cream cheese but you will notice a subtle savory flavor.
Powdered sugar: sweetens the dough without adding that hard grainy texture.
Large egg yolks: the egg yolks bind the pastry together.
Milk powder: the milk powder IS KEY. You cannot substitute milk powder in this recipe. It adds a creamy texture without the added moisture. You can find milk powder online or at your local grocery market.
Custard powder: custard powder is also another way to add texture and flavor without added moisture. You can substitute more corn starch for custard powder but it will lack that extra layer of flavor. You can find custard powder on Amazon.
Corn starch: the cornstarch firms up the pastry and adds a subtle crisp texture.
Cake flour: the cake flour adds to the soft crumbly texture of the pineapple tart.
Kitchen Equipment
Food processor: this mini food processor is my number 1 most used kitchen appliance. It is so easy to use and you can easily control how much the pineapple is processed.
Pineapple Mold: I used this pineapple moldI found on Amazon. Simply grease it with spray oil before using and it works like a charm!
Gel food coloring: gel food coloring is the best option to prevent from adding extra moisture to the dough. My go-to food coloring is Wilton’s gel food coloring.
Silicone Slip mats:silicone slip mats are the best when working with soft dough. They don’t stick and the cookies lift up immediately. Plus they are the perfect size for a half sheet baking tray so you don’t have to take the time to measure and cut out the parchment paper to fit the tray.
How To Make Pineapple tarts
I will admit this pineapple tart recipe is truly a labor of love. It will take a bit of time to cook down the pineapple filling and individually shape out the molds. However, the end result melts in your mouth and is buttery, tart, and delicious. Makes all the effort 100% worth it.
Pineapple Filling
Prepare pineapple. Remove the skin and eyes from the pineapple flesh. Slice the pineapple away from the core. You can also use canned pineapple as well. Using a food processor, chop the pineapple until chopped with small pineapple chunks and not overly pulverized.
Cook pineapple and spices. In a large saucepan, add the pineapple and cinnamon and salt. Heat on medium heat and stir occasionally to prevent from burning. After 15 minutes of simmering, add the sugar and maltose and mix. Continue cooking until the moisture has evaporated and the mixture becomes sticky about 1-1 1/2 hours. The longer you cook it the firmer the jam will be.
Test the desired firmness: take a tablespoon of the jam and place it on a plate in the refrigerator until room temperature. You want the texture to be moist and slightly firm.
Add butter and vanilla. Once you reach desired consistency, turn the heat down low add the butter and mix until melted. Turn the heat off and add the vanilla. At this point you can adjust the sweetness based on your preference, if too sweet add a teaspoon of lemon juice. If too tart, add more sugar.
Shape and freeze. Cool. Using disposable gloves, roll out 25 equal balls of mixture and place on a parchment lined baking tray and freeze in the freezer until firm.
The Pastry
Cream the butter. In a large mixing bowl, using an electric mixer or hand whisk, beat the butter, cream cheese, sugar, salt until pale yellow, creamy and smooth, about 3 minutes on medium speed.
Add egg yolks and vanilla. Scrape down sides of the bowl and whisk until pale and creamy, about 1-2 min on medium speed.
Add cornstarch, milk powder, custard powder. Whisk until the mixture is light and fluffy, about 1-2 min on medium speed.
Using a silicone spatula, sift and fold in cake powder. Fold until incorporated.
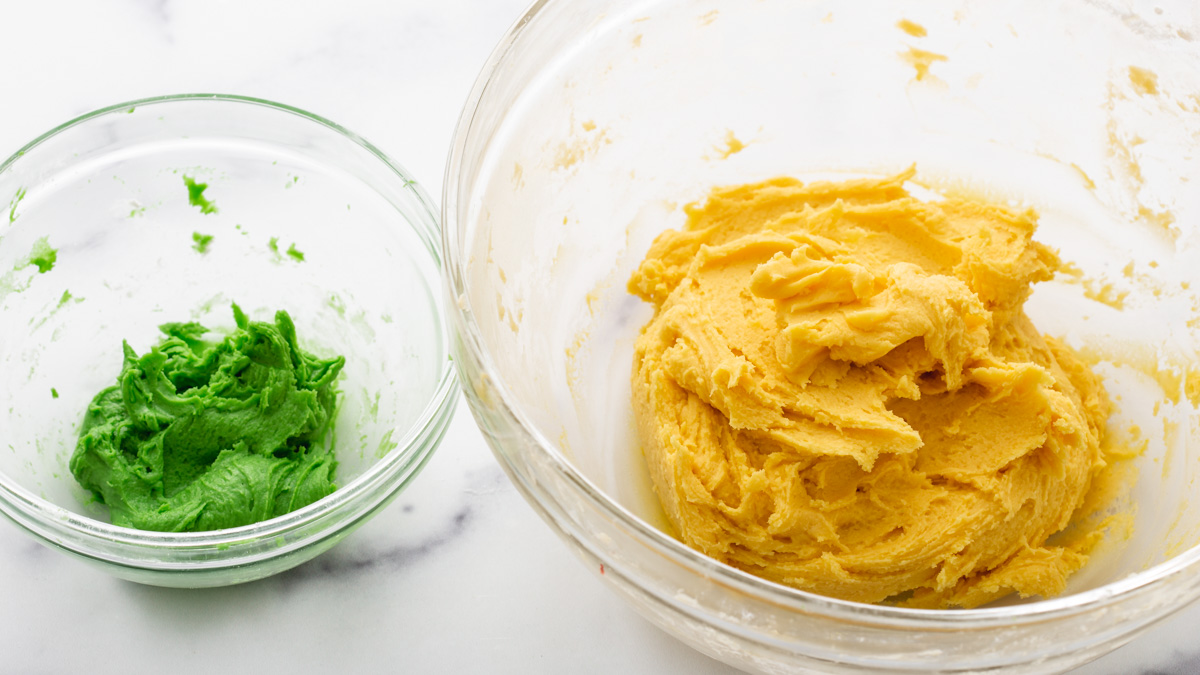
Option A for pineapple mold: Make green dough. Take out 40 g of dough and dye it with green food coloring or pandan extract. Take the remaining dough and dye it with yellow food coloring (optional)
Refrigerate for at least 4 hours or for best results overnight.
Assembly
Preheat oven to 325 F. Line baking sheet with parchment paper.
Option A Pineapple Mold: Roll out the green dough into 24 equal amounts (approximately 2 g each). Roll out the yellow dough into 24 equal amounts (approximately 18 g each). Freeze for at least 20 minutes.
Take the yellow dough and form a flat disc. Add the pineapple filling and form a log the size of the mold.
Lightly grease your pineapple mold with spray oil. Press the green dough ball into the mold first where the leaves are. Next place the yellow pineapple filled dough into the mold.
Press the mold onto the parchment lined baking sheet to eject the pineapple tart. The tarts should be placed 1 inch apart. Continue until finished
Option B No Mold: Roll out the dough into a flat disc. Add the pineapple and roll into a ball. Place on baking tray 1 inch apart.
(Optional) To prevent the tarts from spreading, freeze the assembled tarts for 15-20 minutes before baking.
Bake at 325°F for 12 minutes turning the tray halfway through. After 12 minutes, take the tray out and very lightly brush the egg wash and continue baking for 5 minutes or until slightly golden brown.
Tips For The Best Pineapple Tarts
Use a food processor to blend the pineapple. A food processor allows you to easily control how blended the pineapple bits get. Using a blender may lead to over-blending.
Test the desired firmness of pineapple jam before adding butter: take a tablespoon of the jam and place it on a plate in the refrigerator until room temperature. It should firm up as it chills.. You want the texture to be moist and slightly firm. Undercooking the jam will also make the jam difficult to shape and work with.
Use a wide pot for the pineapple jam. The larger surface area will allow the pineapple juices to evaporate and cook down faster.
Work in a cool environment and freeze the dough. These pineapple tarts have a crumbly crust which means that they need to be worked rather quickly or they will melt in your hands. Make sure to turn the air on in your home, and freeze the dough and pineapple jam for optimal shaping.
To prevent cracking in the crust, lightly glaze the pineapple part of the crust (not the leaves) after it is baked for at least 12 minutes and place it back in the oven to continue baking for 5-6 minutes.
Only glaze the yellow pineapple base, not the leaves. The glaze will turn slightly yellow/brown and will lose all the texture on the leaves. Also, only use the smallest amount of glaze to prevent it from being overly glossy, and losing the texture of the mold.
Storage Instructions
These pineapple tarts are best eaten at least 24 hours after baking. This allows the pastry to age and the flavors to blend together. They can be eaten immediately but they may be a bit crumbly the first day.
Store in an airtight container at room temperature for up to 2 weeks. They may last even longer depending on your room temperature.
One bite into these melt in your mouth pineapple tarts and you are instantly greeted with a sweet and savory crumbly pastry that highlights a tropical, tangy pineapple spiced jam filling. These popular Lunar New Year treats are perfect for bringing good luck and prosperity all year round!
Prepare pineapple. Remove the skin and eyes from the pineapple flesh. Slice the pineapple away from the core. You can also use canned pineapple as well. Using a food processor, chop the pineapple until chopped but not too fine. Leave some pineapple pieces for added texture.
Cook pineapple and spices. In a large saucepan, add the pineapple and cinnamon, and salt. Heat on medium heat and stir occasionally to prevent burning. After 15 minutes of simmering, add the sugar and maltose and mix. Continue cooking until the moisture has evaporated and the mixture becomes sticky about 1-1 1/2 hours. The longer you cook it the firmer the jam will be.
Test the desired firmness: take a tablespoon of the jam and place it on a plate in the refrigerator until room temperature. You want the texture to be moist and slightly firm.
Add butter and vanilla. Once you reach desired consistency, turn the heat down low add the butter and mix until melted. Turn the heat off and add the vanilla. At this point, you can adjust the sweetness based on your preference, if too sweet add a teaspoon of lemon juice. If too tart, add more sugar.
Shape and freeze. Cool. Using disposable gloves, roll out 25 equal balls of mixture and place on a parchment-lined baking tray, and freeze in the freezer until firm.
The Pastry
Cream the butter. In a large mixing bowl, using an electric mixer or hand whisk, beat the butter, cream cheese, sugar, salt until pale yellow, creamy and smooth, about 3 minutes on medium speed.
Add egg yolks and vanilla. Scrape down the sides of the bowl and whisk until pale and creamy, about 1-2 min on medium speed.
Add cornstarch, milk powder, custard powder. Whisk until the mixture is light and fluffy, about 1-2 min on medium speed.
Using a silicone spatula, sift and fold in cake powder. Fold until incorporated. Refrigerate for at least 4 hours or for best results overnight.
Option A for pineapple mold
Make the green dough. Take out 40 g of dough and dye it with green food coloring or pandan extract. Take the remaining dough and dye it with yellow food coloring (optional).
Preheat oven to 325°F. Line baking sheet with parchment paper.
Roll out the green dough into 24 equal amounts (approximately 2 g each). Roll out the yellow dough into 24 equal amounts (approximately 18 g each). Freeze for at least 20 minutes.
Take the yellow dough and form a flat disc. Add the pineapple filling and form a log the size of the mold.
Lightly grease your mold with spray oil. Press the green dough ball into the mold first where the leaves are. Next place the yellow pineapple-filled dough into the mold.
Press the mold onto the parchment-lined baking sheet to eject the pineapple tart. The tarts should be placed 1 inch apart. Continue until finished
Option B No Mold:
Roll out the dough into a flat disc. Add the pineapple and roll into a ball. Place on baking tray 1 inch apart.
To prevent the tarts from spreading, freeze the assembled tarts for 15-20 minutes before baking.
Bake at 325°F for 12 minutes turning the tray halfway through. After 12 minutes, take the tray out and very lightly brush the egg wash and continue baking for 5 minutes or until slightly golden brown.
Notes
Use a food processor to blend the pineapple. This allows you to easily control how blended the pineapple bits get. Using a blender may lead to over-blending.
Test the desired firmness of the pineapple jam before adding butter: take a tablespoon of the jam and place it on a plate in the refrigerator until room temperature. It should firm up as it chills. You want the texture to be moist and slightly firm. Undercooking the jam will also make the jam difficult to shape and work with.
Use a wide pot for the pineapple jam. The larger surface area will allow the pineapple juices to evaporate and cook down faster.
Work in a cool environment and freeze the dough. This tart has a crumbly crust which means that it needs to be worked rather quickly or it will melt in your hands. Make sure to turn the air on in your home, and freeze the dough and pineapple jam for optimal shaping.
To prevent cracking in the crust, lightly glaze the pineapple part of the crust (not the leaves) after it is baked for at least 12 minutes and place it back in the oven to continue baking for 5-6 minutes.
Only glaze the yellow pineapple base, not the leaves. The glaze will turn slightly yellow/brown and will lose all the texture on the leaves. Also, only use the smallest amount of glaze to prevent it from being overly glossy, and losing the texture of the mold.
Storage Instructions. These pineapple tarts are best eaten at least 24 hours after baking. This allows the pastry to age and the flavors to blend together. They can be eaten immediately but they may be a bit crumbly the first day. Store in an airtight container at room temperature for up to 2 weeks. They may last even longer depending on your room temperature.


Rate & Review What did you think of this recipe?