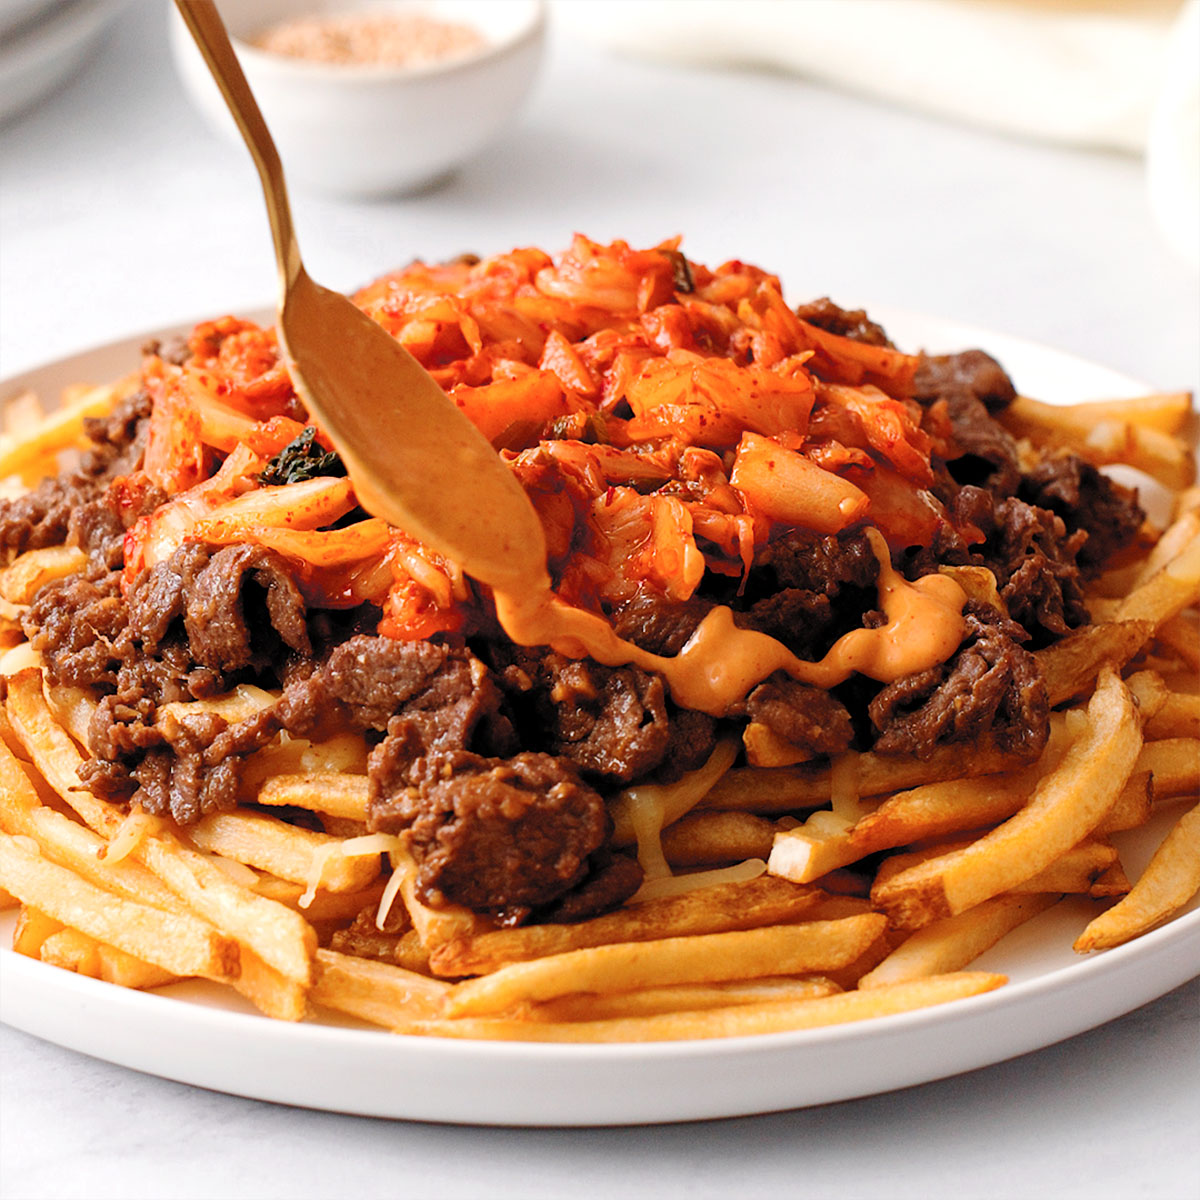
These loaded Korean bulgogi fries topped with marinated beef bulgogi, kimchi, cilantro, and a gochujang aioli will be a crowd-pleaser for your next hosting event. These Korean fries will keep you coming back for more guaranteed! If you are a fan of loaded fries, you MUST try these Korean bulgogi fries. These loaded Korean fries
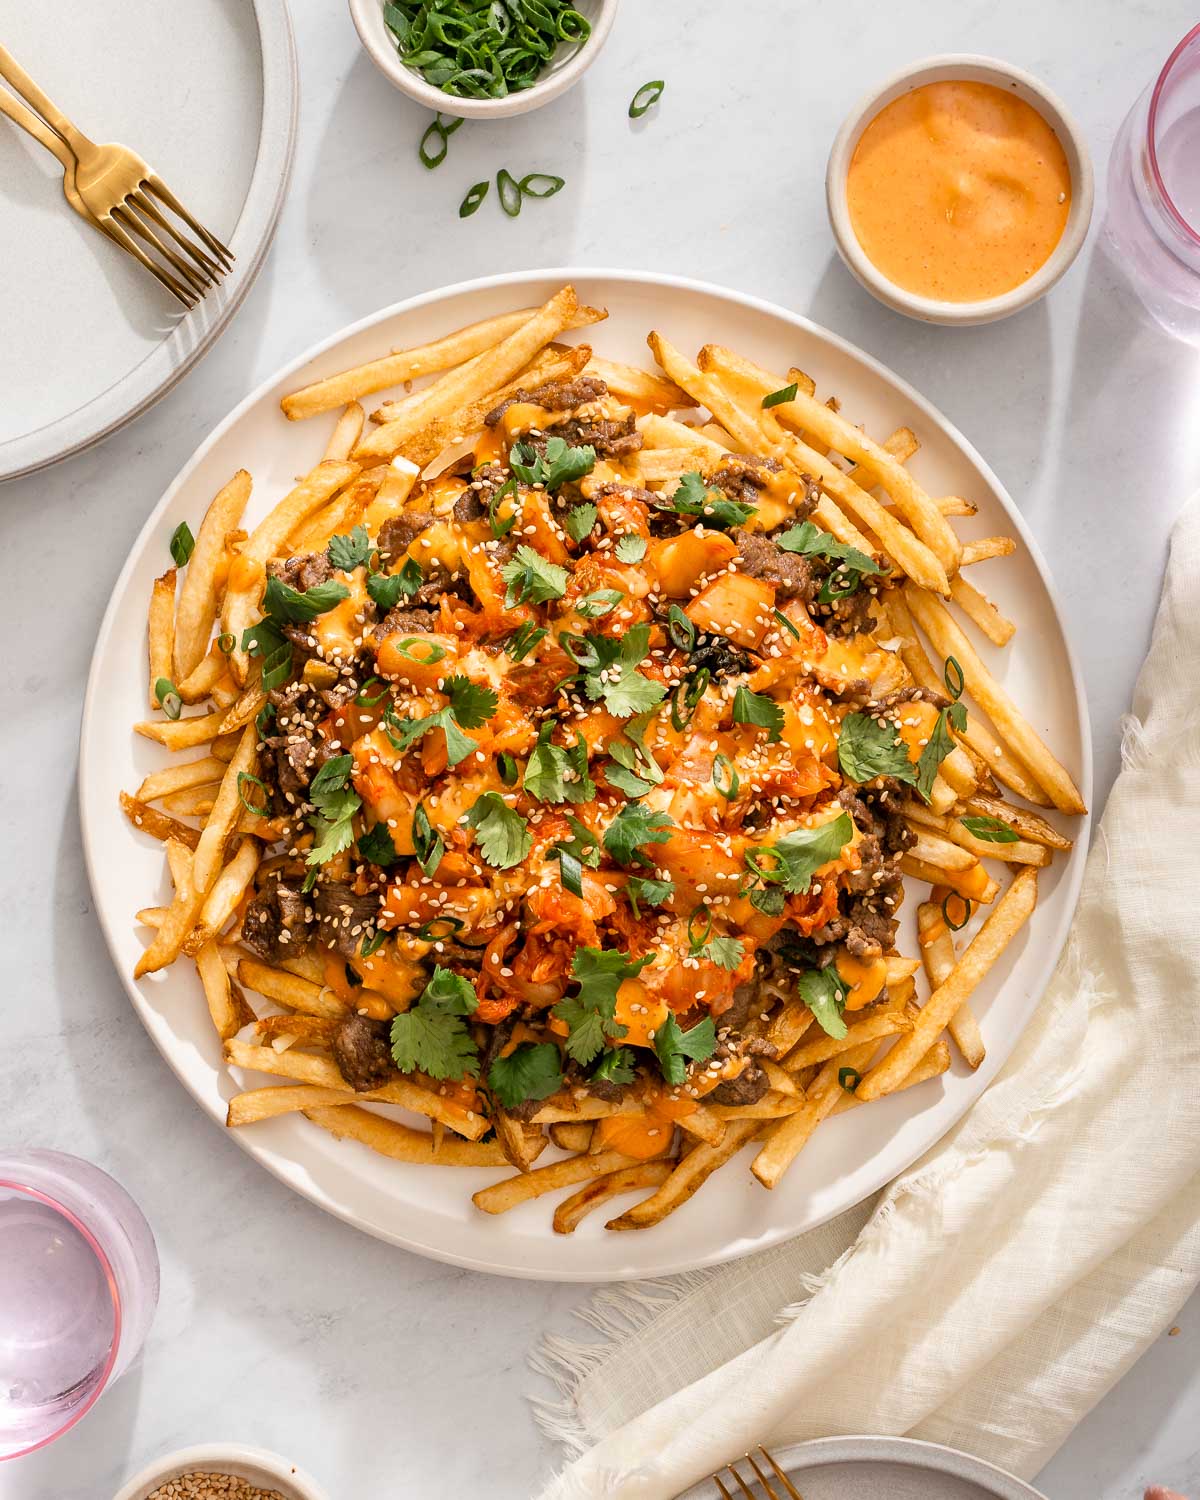
These loaded Korean bulgogi fries topped with marinated beef bulgogi, kimchi, cilantro, and a gochujang aioli will be a crowd-pleaser for your next hosting event. These Korean fries will keep you coming back for more guaranteed!
If you are a fan of loaded fries, you MUST try these Korean bulgogi fries. These loaded Korean fries are made with sweet, soy garlic marinated bulgogi beef, tangy and salty kimchi, and a sweet and spicy gochujang aioli all topped on a bed of crispy fries of your choosing.
These Korean kimchi cheese fries are the perfect appetizer for your next dinner party, event, or watch party. If you loved these Korean bulgogi fries and want some more finger food appetizers, then check out my gochujang chicken wings, soy garlic chicken wings, and Korean corn cheese.
There are probably a million reasons why you will love eating these bulgogi kimchi fries, but here are 3 good reasons why you should make this recipe.
Easy: This bulgogi kimchi fries recipe is so incredibly easy to make. The hardest part is waiting for the bulgogi to marinate!
Flavorful. The Korean flavors in these bulgogi fries are out of this world. First, you’ll have the deliciously sweet, savory bulgogi meat topped with salty, tangy kimchi, and finish with a drizzle of spicy and sweet gochujang aioli.
Crowd Pleaser: these bulgogi kimchi cheese fries will be an immediate hit at your next dinner party, event, or watch party!
Kitchen Equipment
These bulgogi fries only need the following items of kitchen equipment:
Mixing Bowls: you will need mixing bowls to marinate the bulgogi and mix the gochujang aioli.
Food Processor or Blender: you will either need a food processor or blender to pulverize the Asian pear and yellow onion to create a puree.
Baking Sheet Pan: one half-sheet baking pan will be large enough to bake the fries and melt the cheese on top of the fries.
Ingredients
You can find all of the ingredients for this bulgogi kimchi fries recipe at your local grocery market!
Bulgogi
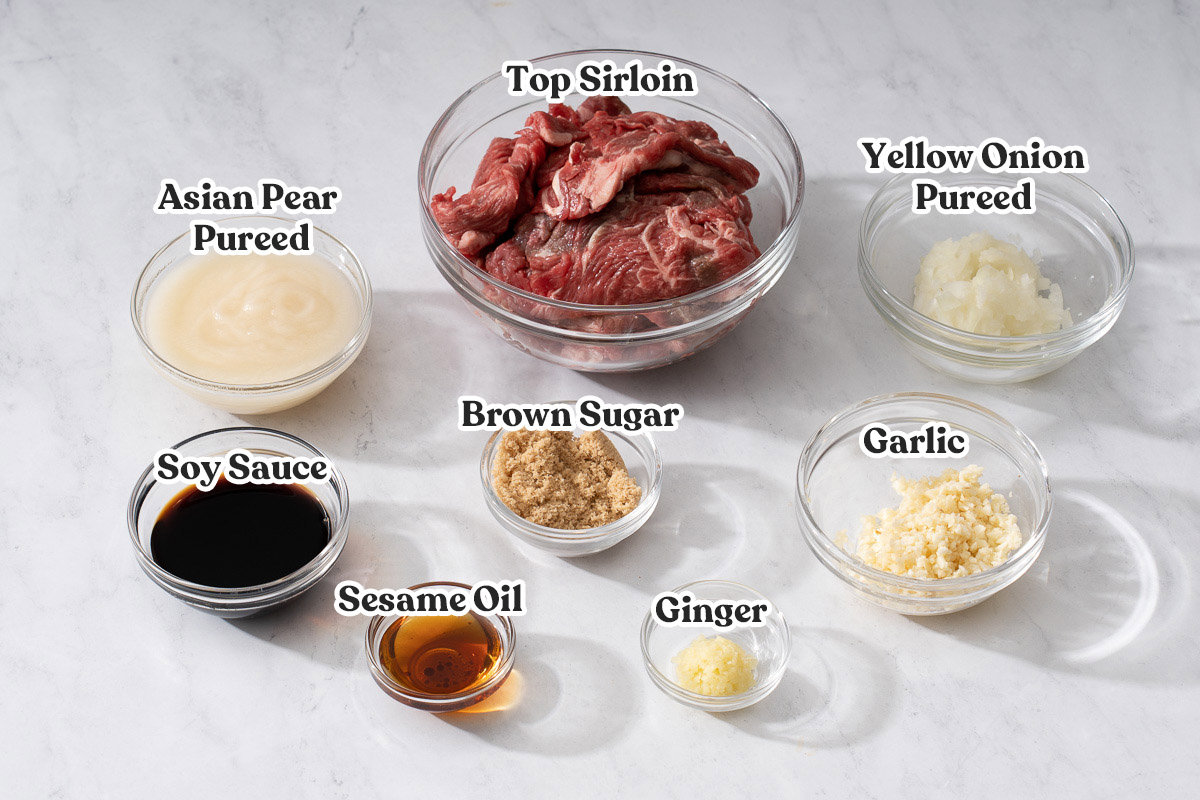
Asian pear: Asian pear acts as a meat tenderizer as well as a sweetness enhancer. Make sure to peel the Asian pear before making the puree in your blender or food processor.
Yellow Onion: sweetens the marinade and acts as an aromatic
Ginger and Garlic: other main aromatic ingredients for the bulgogi.
Soy sauce:soy sauce acts as the main base for the marinade. It adds saltiness and umami flavor to the beef.
Brown sugar: a touch of brown sugar sweetens and balances the flavors of the other marinade ingredients
Toasted sesame oil: adds a touch of nuttiness to the bulgogi marinade. Make sure to add the toasted sesame oil after you already mix the beef with the other marinade ingredients. This will allow the beef to soak in the other marinade ingredients better without slipping off.
Rib eye: make sure to thinly slice the beef to be about 1/8 inch thick or buy the meat pre-sliced.
Gochujang Aioli
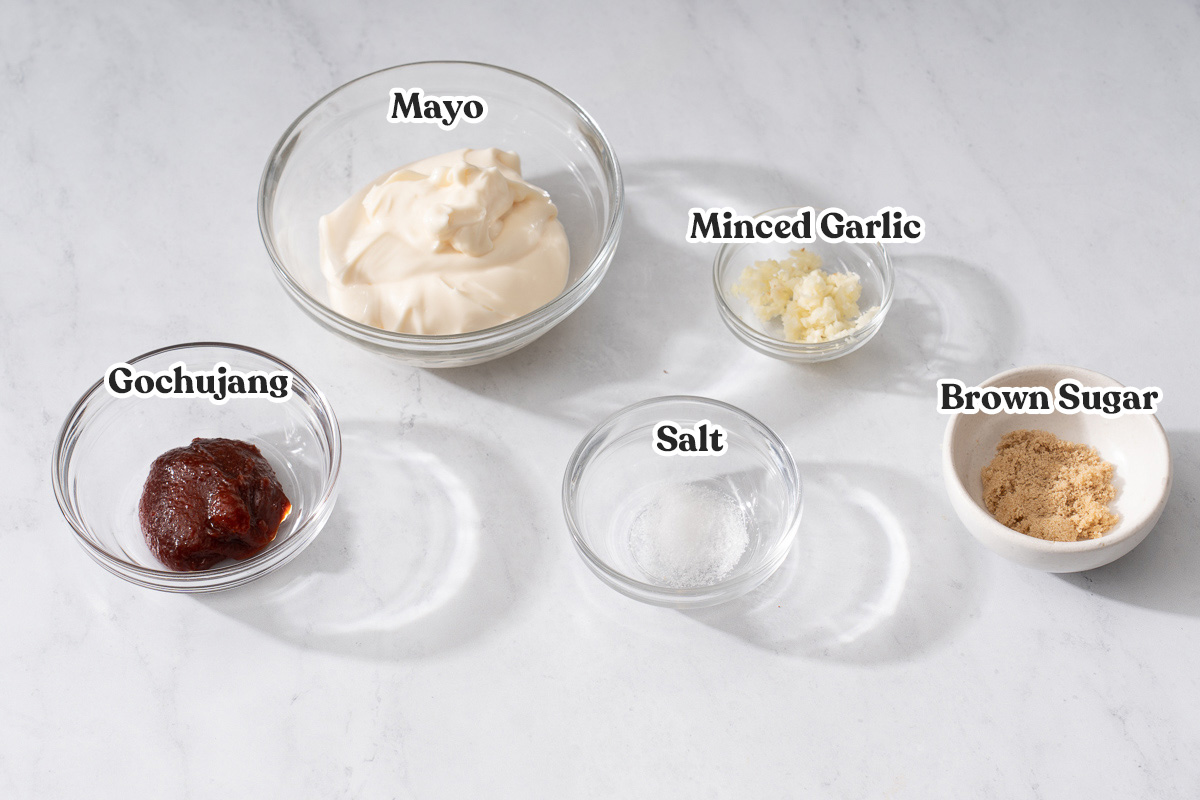
Mayonnaise:mayonnaise acts as the base of the gochujang aioli.
Gochujang: This is the key ingredient for this gochujang aioli. It adds a sweet spicy chili flavor. You can buy gochujang online here or at your local Korean grocery store
Garlic: adds a garlicky aromatic to the aioli.
Brown sugar: a touch of sugar balances out the spiciness from the gochujang
Salt: a pinch of salt enhances the flavors of the other ingredients.
Fries and Toppings
French Fries: you can use your favorite fries brand for this recipe. I like to use regular cut, crinkle cut, or waffle fries.
Kimchi: kimchi balances out the rich bulgogi beef flavors and adds a tangy, salty, pungent punch to these kimchi fries.
Shredded Mozzarella cheese: kimchi and mozzarella cheese are a match made in heaven.
Green onion and Cilantro: for garnish and fresh flavors
Toasted sesame seeds: add toasted sesame seeds for garnish and added nutty texture.
Substitutions and Additions
This Korean bulgogi fries recipe can easily be customized based on your preferences! I’ve listed some substitutions and additions below.
Substitutions
Vegan or Vegetarian option: you can substitute the bulgogi beef for tofu, the mayonnaise for vegan mayonnaise, and vegan mozzarella cheese for vegan Korean fries.
Top Sirloin: instead of rib eye you can opt for top sirloin instead
Cheese: if mozzarella cheese isn’t your thing, swap it out with your favorite shredded cheese flavor!
Sweet potato fries: instead of regular potato fries you can upgrade to sweet potato fries.
Sriracha Mayo: add a drizzle of sriracha mayo instead of gochujang aioli.
Additions
Vegetables: you can add other vegetable toppings to these loaded kimchi cheese fries such as chopped white onion, tomatoes, avocados, etc.
How to Make Bulgogi Fries
You can easily make these bulgogi kimchi fries recipe by following the few easy steps below. If you are making the bulgogi from scratch I recommend planning ahead!
Bulgogi
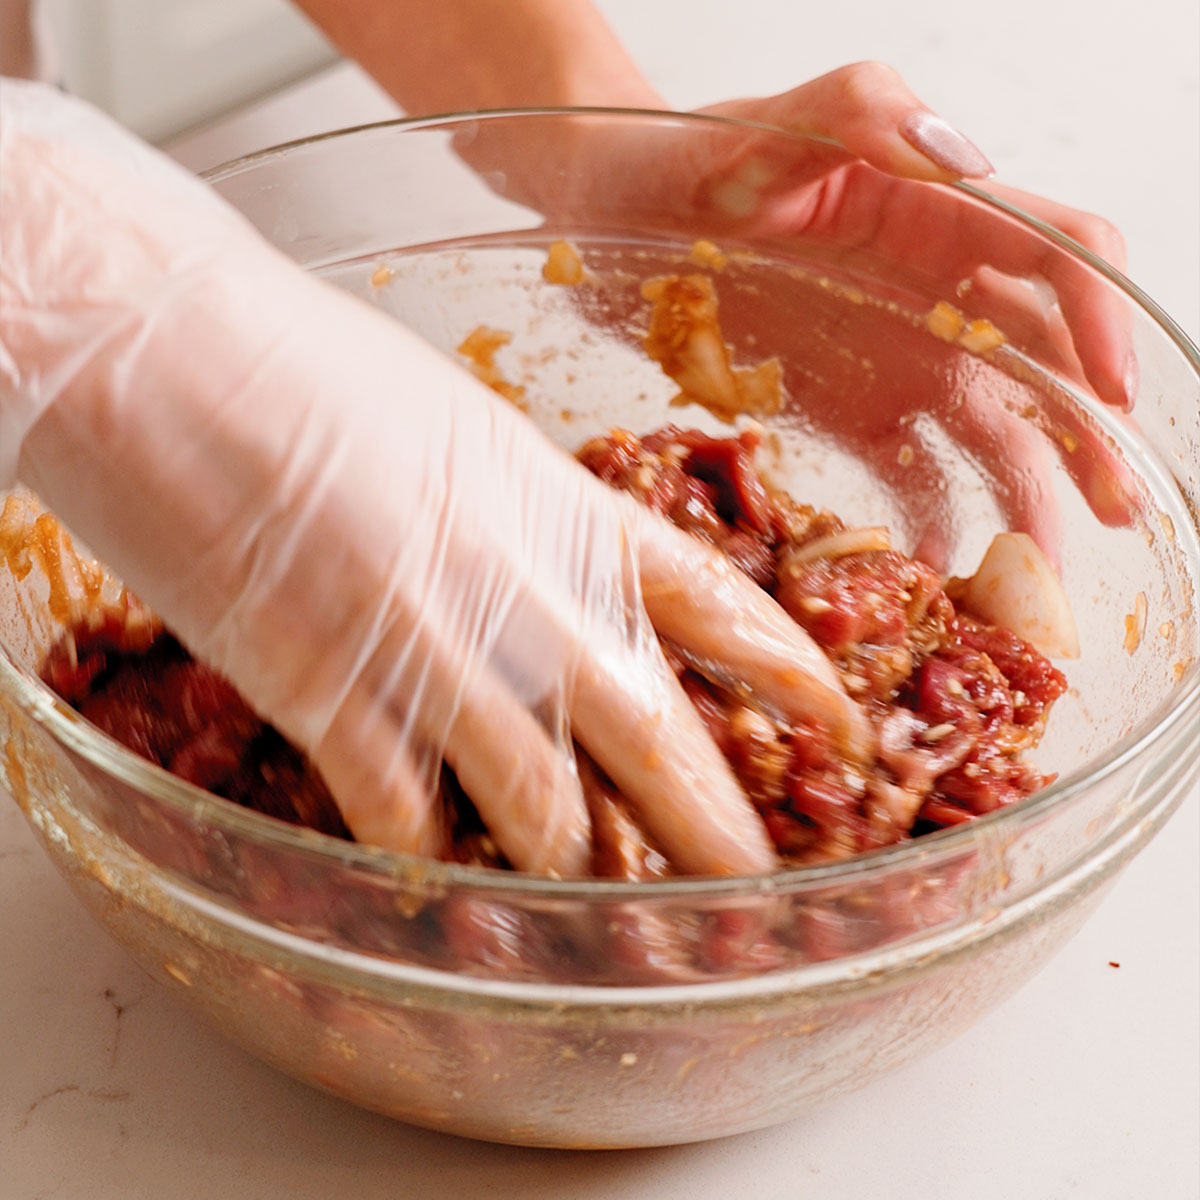
Marinate the bulgogi. In a large mixing bowl, mix together the pureed Korean pear, pureed onion, minced garlic, minced ginger, soy sauce, and brown sugar. Add the sliced beef and mix until thoroughly coated. Lastly, add the sesame oil and mix until combined. Cover and chill in the refrigerator for at least 3-4 hours.
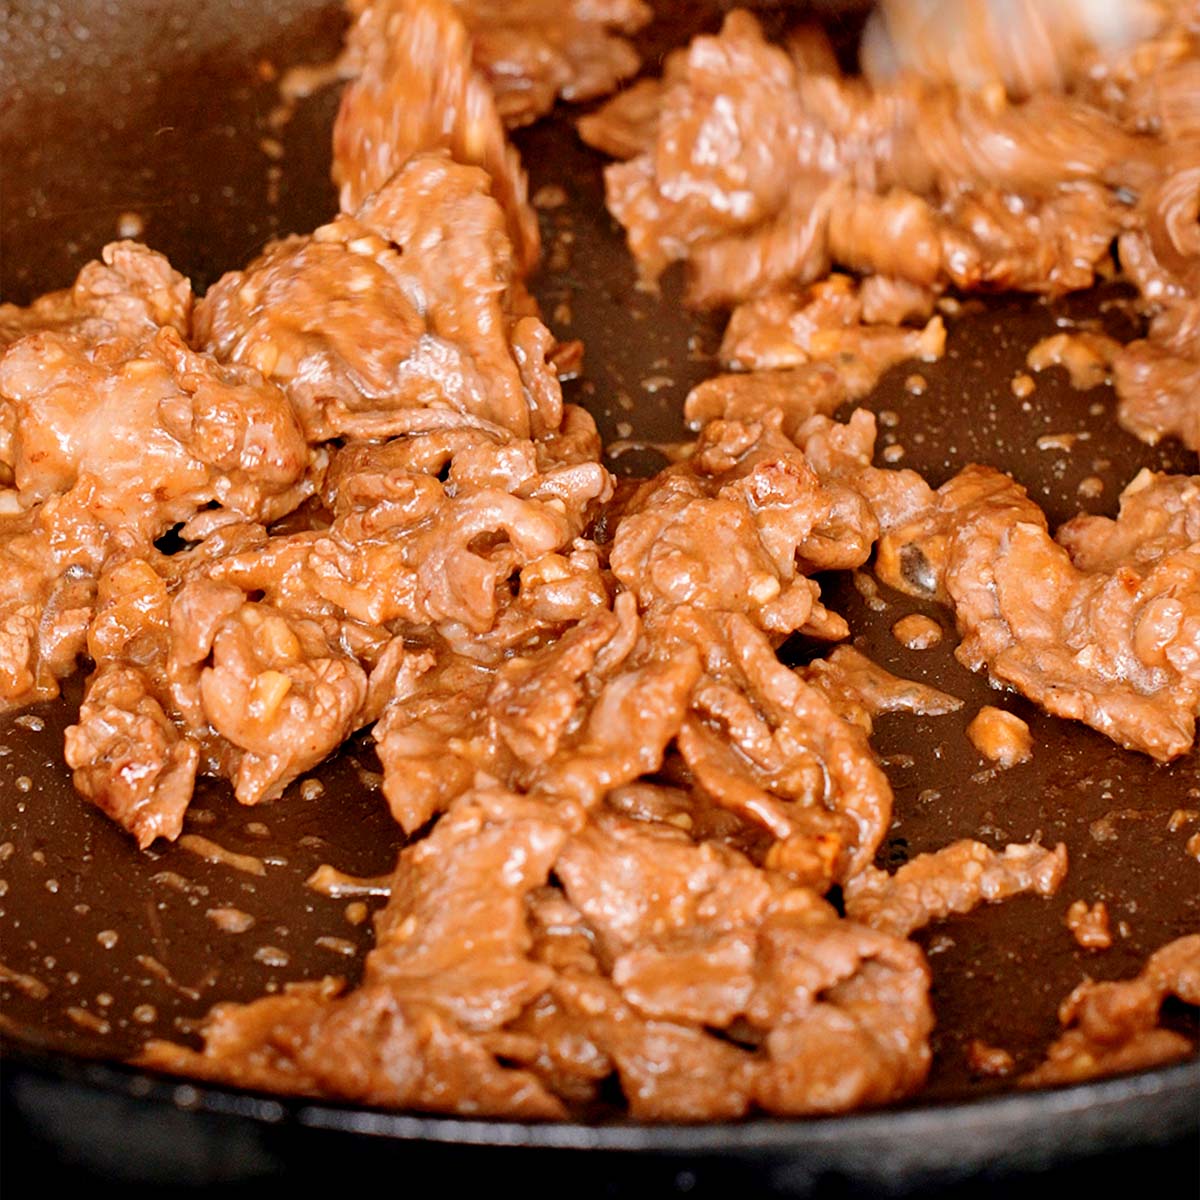
Cook the meat. Preheat your skillet or bbq grill on medium-high heat until hot. Add 1-2 tablespoons of cooking oil and spread it around the pan. Cook the meat on medium-high heat for 3-5 minutes or until cooked.
Gochujang Aioli
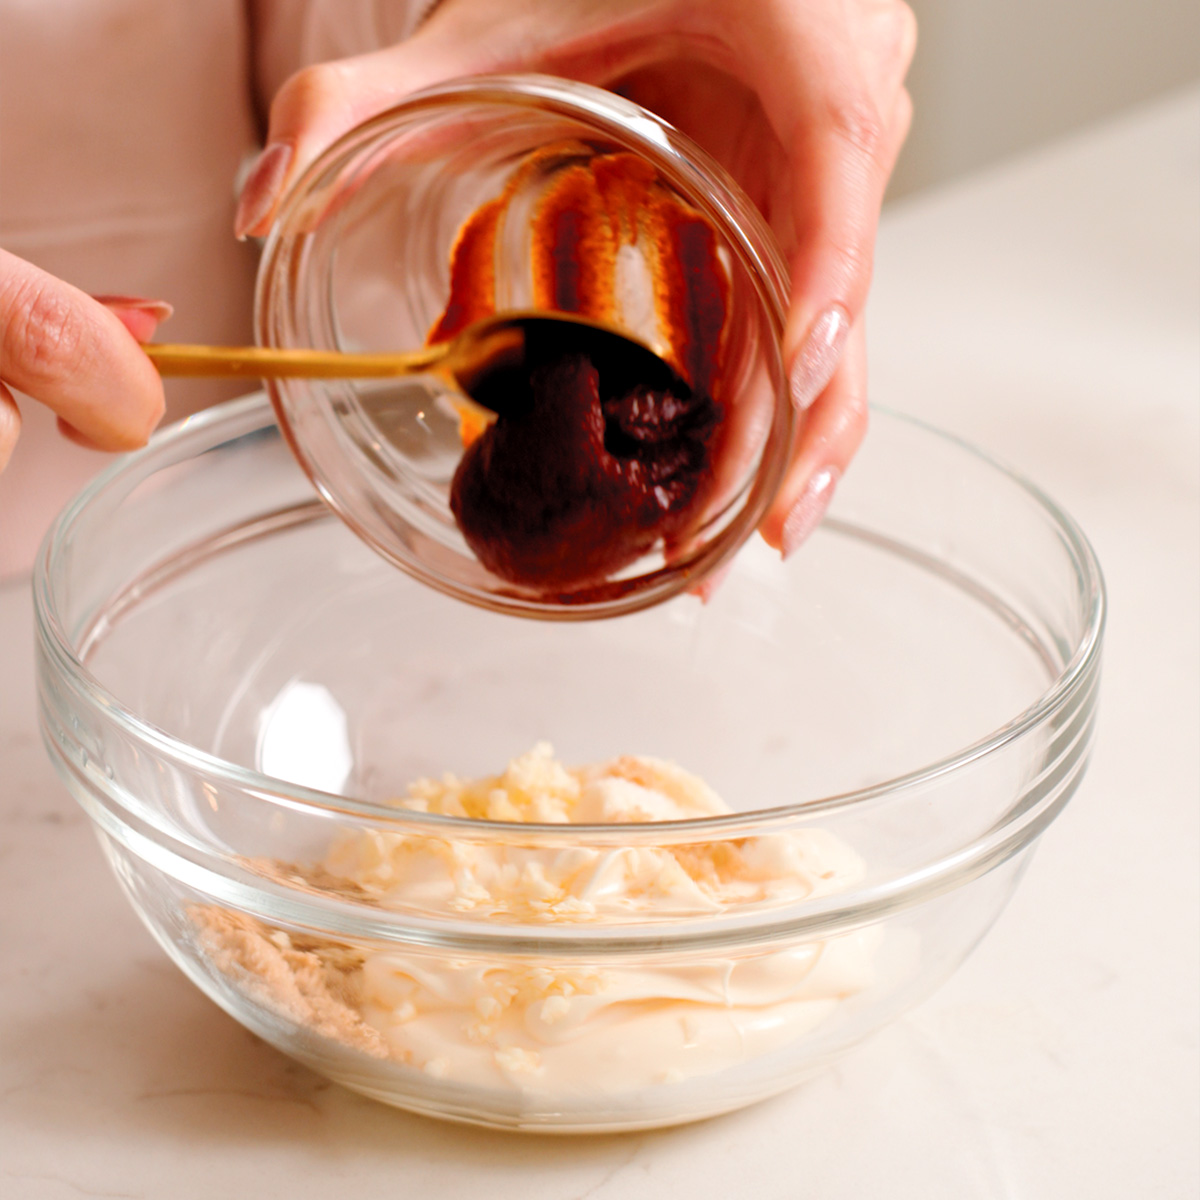
Make gochujang aioli. In a small mixing bowl, add the mayonnaise, gochujang, garlic, brown sugar, and salt. Mix until the sugar and salt dissolve. Set aside.
Fries
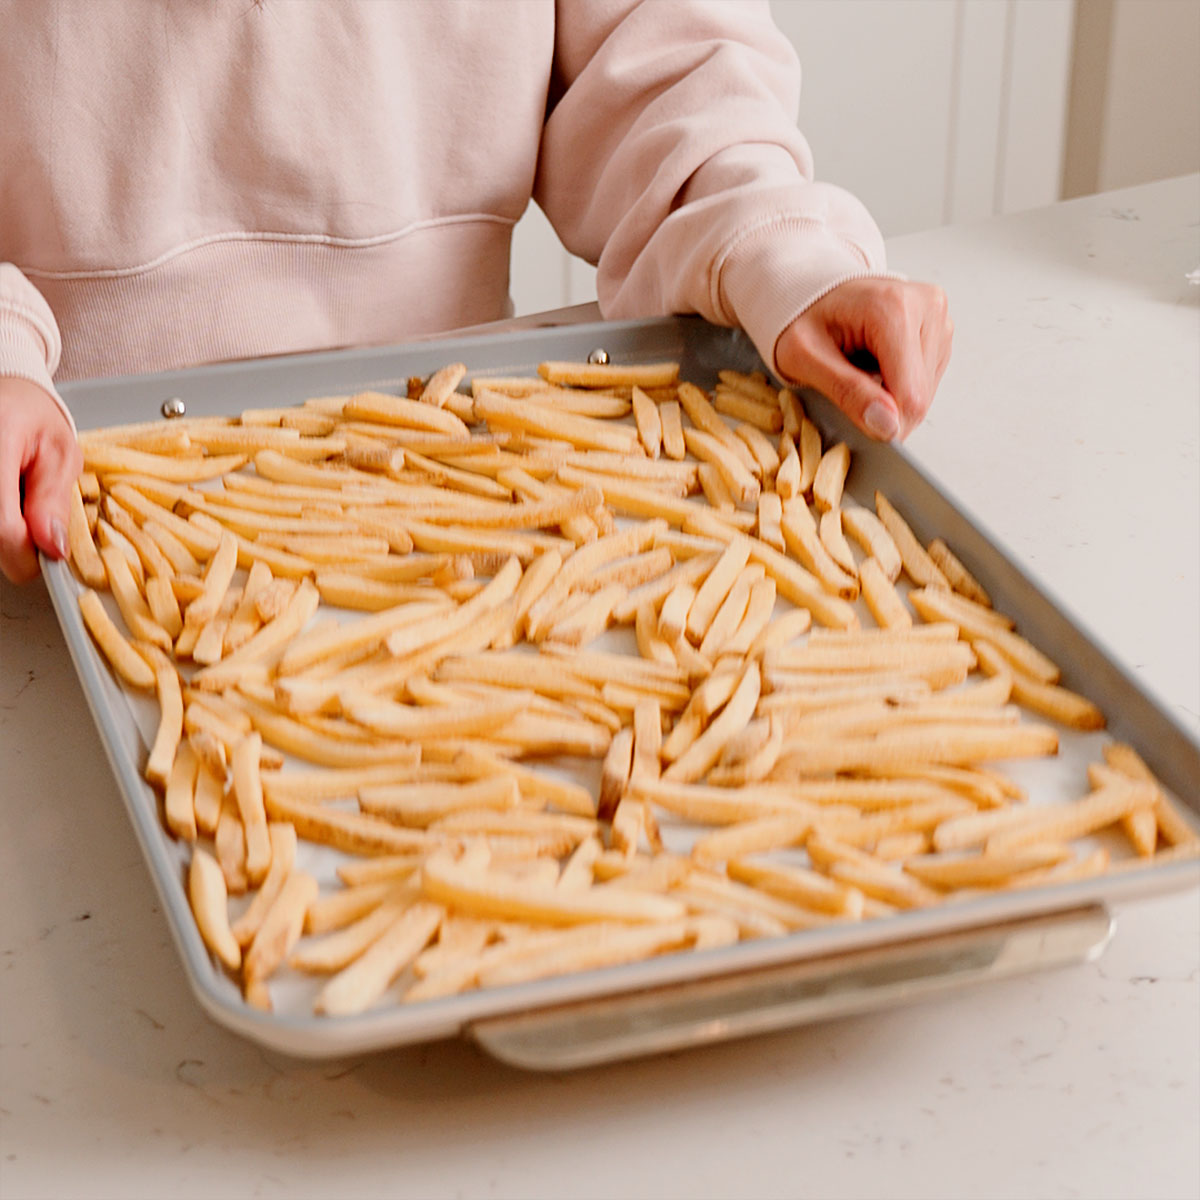
Prepare the Fries. Prepare the fries according to the package directions.
Prepare the oven. Preheat oven to 350°F (177°C) and place the wire rack in the center of the oven.
Melt the cheese. Arrange the fries on a large baking sheet. Top with bulgogi and mozzarella cheese. Bake in the oven for 10 minutes or until the cheese has melted.
Assemble. Top with chopped kimchi, green onion, chopped cilantro, and sesame seeds. Then drizzle on the gochujang aioli. Serve immediately. Enjoy!
Tips for the Best Bulgogi Fries
Marinate the beef for at least 4 hours. In order for the bulgogi beef to have the best-tasting flavor, I recommend marinating the beef the night before or for a minimum of 3 hours.
Slightly cook the fries 2-3 minutes longer than the package for extra crispy fries. Since these toppings carry a bit of moisture, these Korean fries may get soggy over time. To extend the life of the crispiness, I recommend adding a few more minutes to the cooking time for the french fries.
Customize the toppings based on your preferences! If you don’t like adding any of my kimchi fries toppings, you can go ahead and add or subtract whichever toppings you prefer! I’ve suggested some in the substitutions and additions section.
Storage Instructions
These bulgogi kimchi cheese fries are best served immediately. You can store them in an airtight container in the refrigerator however, the fries will no longer be crispy over time. You can reheat the Korean fries without the toppings in the oven or air fryer but they may not be as crisp.
Frequently Asked Q’s & A’s
What is Bulgogi?
Bulgogi literally means “fire meat” in Korean. It is typically marinated slices of meat, most commonly beef that is grilled on a barbecue or on a stovetop griddle.
What type of fries can I use?
For this kimchi fries recipe, you can use crinkle cut, waffle cut, regular, or even tater tots as your base.
Can I use an air fryer to cook the fries?
Of course! You can cook the fries in an air fryer according to the package instructions. Just make sure to not overcrowd the air fryer basket to prevent the fries from getting soggy.
Can I prepare these Korean fries in advance?
Yes! You can prepare the bulgogi and all the toppings ahead of time. When you are ready to eat simply heat your fries and add the toppings.
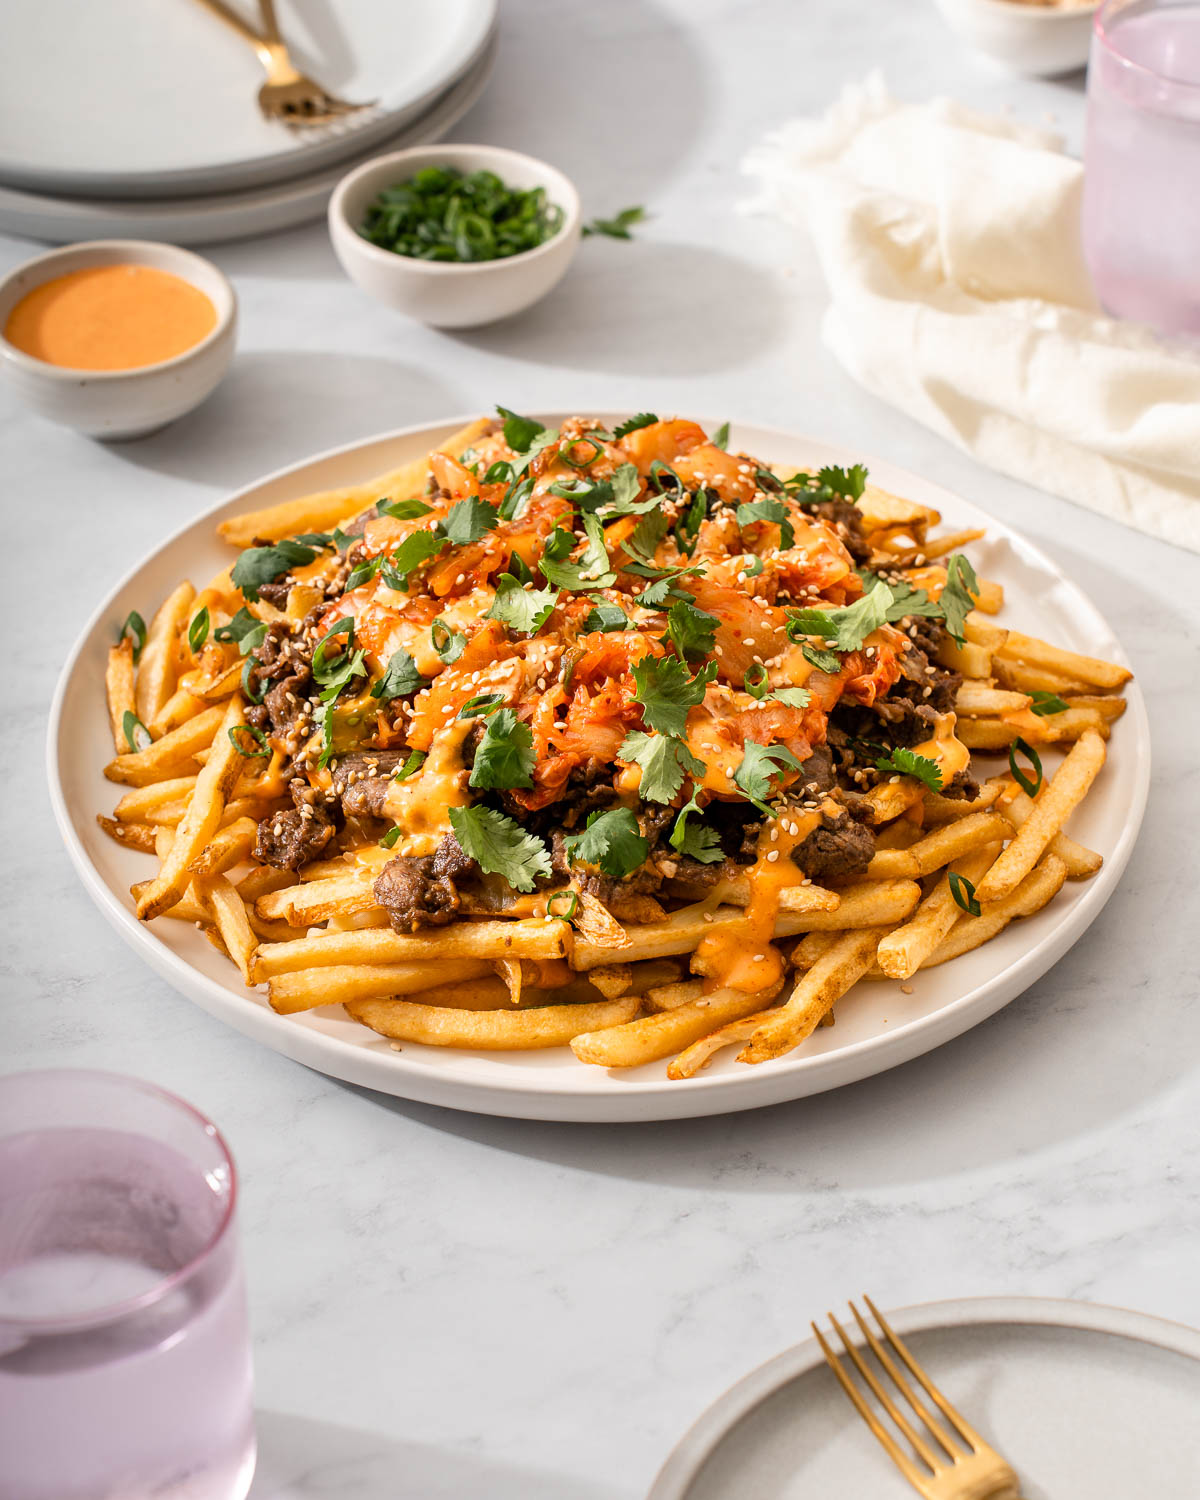
These loaded Korean bulgogi fries topped with marinated beef bulgogi, kimchi, cilantro, and gochujang aioli will be an instant crowd-pleaser for your next hosting event. These Korean fries will keep you coming back for more guaranteed!
Marinate the bulgogi. In a large mixing bowl, mix together the pureed Korean pear, pureed onion, minced garlic, minced ginger, soy sauce, and brown sugar. Add the sliced beef and mix until thoroughly coated. Lastly, add the sesame oil and mix until combined. Cover and chill in the refrigerator for at least 3-4 hours.
Cook the meat. Preheat your skillet or bbq grill on medium-high heat until hot. Add 1-2 tablespoons of cooking oil and spread it around the pan. Cook the meat on medium-high heat for 3-5 minutes or until cooked.
Gochujang Aioli
Make gochujang aioli. In a small mixing bowl, add the mayonnaise, gochujang, garlic, brown sugar, and salt. Mix until the sugar and salt dissolve. Set aside.
Fries
Prepare the fries. Prepare the fries according to the package directions.
Prepare the oven. Preheat oven to 350°F (177°C) and place the wire rack in the center of the oven.
Melt the cheese. Arrange the fries on a large baking sheet. Top with bulgogi and mozzarella cheese. Bake in the oven for 5-10 minutes or until the cheese has melted.
Assemble. Arrange the fries on a serving plate, and top with mozzarella cheese, bulgogi, chopped kimchi, green onion, chopped cilantro, and sesame seeds. Then drizzle on the gochujang aioli. Serve immediately. Enjoy!
Notes
Marinate the beef for at least 4 hours. In order for the bulgogi beef to have the best-tasting flavor, I recommend marinating the beef the night before or for a minimum of 4 hours.
Slightly cook the fries 2-3 minutes longer than the package for extra crispy fries. Since these toppings carry a bit of moisture, these Korean fries may get soggy over time. To extend the life of the crispiness, I recommend adding a few more minutes to the cooking time for the french fries.
Customize the toppings based on your preferences! If you don’t like adding any of my kimchi fries toppings, you can go ahead and add or subtract whichever toppings you prefer! I’ve suggested some in the substitutions and additions section.
Storage Instructions: These bulgogi kimchi cheese fries are best served immediately. You can store them in an airtight container in the refrigerator however, the fries will no longer be crispy over time. You can reheat the Korean fries without the toppings in the oven or air fryer but they may not be as crisp.


The right combination of spicy and crunchy. A great appetizer.
Delicious and easy to put together! We had leftover gochujang ailoi and used them for breakfast sandwiches too 🙂
Oooh, that definitely has us wanting to play with some breakfast recipes with the aioli now! 🙂