When corn and cheese marry together in a mini cast iron skillet they create a beautiful harmony. Name a better duo than corn and mozzarella cheese. I’ll wait. This Korean corn cheese is one of my favorite summer side dishes. It is so cheesy, delicious, and incredibly easy to make. It is typically eaten with Korean BBQ but it also pairs really nicely with a glass of Korean Strawberry Milk and some juicy Korean Gochujang Chicken wings.
This corn cheese is great as a side dish, or all on its own as an indulgent snack.
What is Korean Corn Cheese?
Korean Corn Cheese is a very popular side dish that is most commonly served at Korean BBQ restaurants. You can find them in a little insert around the grill at the table or it is served in a bubbling hot dish.
The first time I saw corn cheese at a KBBQ restaurant my jaw literally dropped to the floor. This was the most genius and delicious invention ever. This is probably due to the fact that I absolutely love corn and cheese separately, but together they are simply heaven. So grab some corn, mozzarella cheese, and a cast-iron skillet, and let’s get cooking!
This recipe is perfect for those looking for a delicious side when they’re pinched for time.
Ingredients and substitutes
Corn on the cob: is normally found in grocery stores during the summer months. If it is not available, you can opt for frozen or canned corn.
Cayenne Pepper: this adds a little kick to the Korean corn cheese. The amount of spice is up to you.
Kewpie Mayonnaise: Kewpie mayonnaise is my favorite type of mayo to cook with. It is different than American mayo in that it is only made with egg yolks and not whole eggs and does not have any added salt or sugar. Kewpie is basically mayo on crack with its addictive tangy flavor. You can find Kewpie mayo online or at your local Asian grocery store. However, you can also substitute Kewpie with American mayo.
Granulated Sugar: the sugar is used to sweeten the corn if using fresh corn on the cob. If the corn that you buy is canned or particularly sweet then can omit the sugar depending on your flavor preferences.
Salt and Pepper: a pinch of salt and pepper to helps enhance the flavors of this dish.
Salted Butter: the salted butter gives the corn the cream feel and taste that we all love.
Green Onion: the green onion gives the cheese corn that pops of color and flavor.
Mozzarella Cheese: mozzarella cheese is a must for that classic Instagram cheese pull we all love. It is a mild cheese with a subtle flavor that perfectly compliments the corn.
How to Make Korean Corn Cheese
Prepare the oven. Preheat broil to 450˚F.
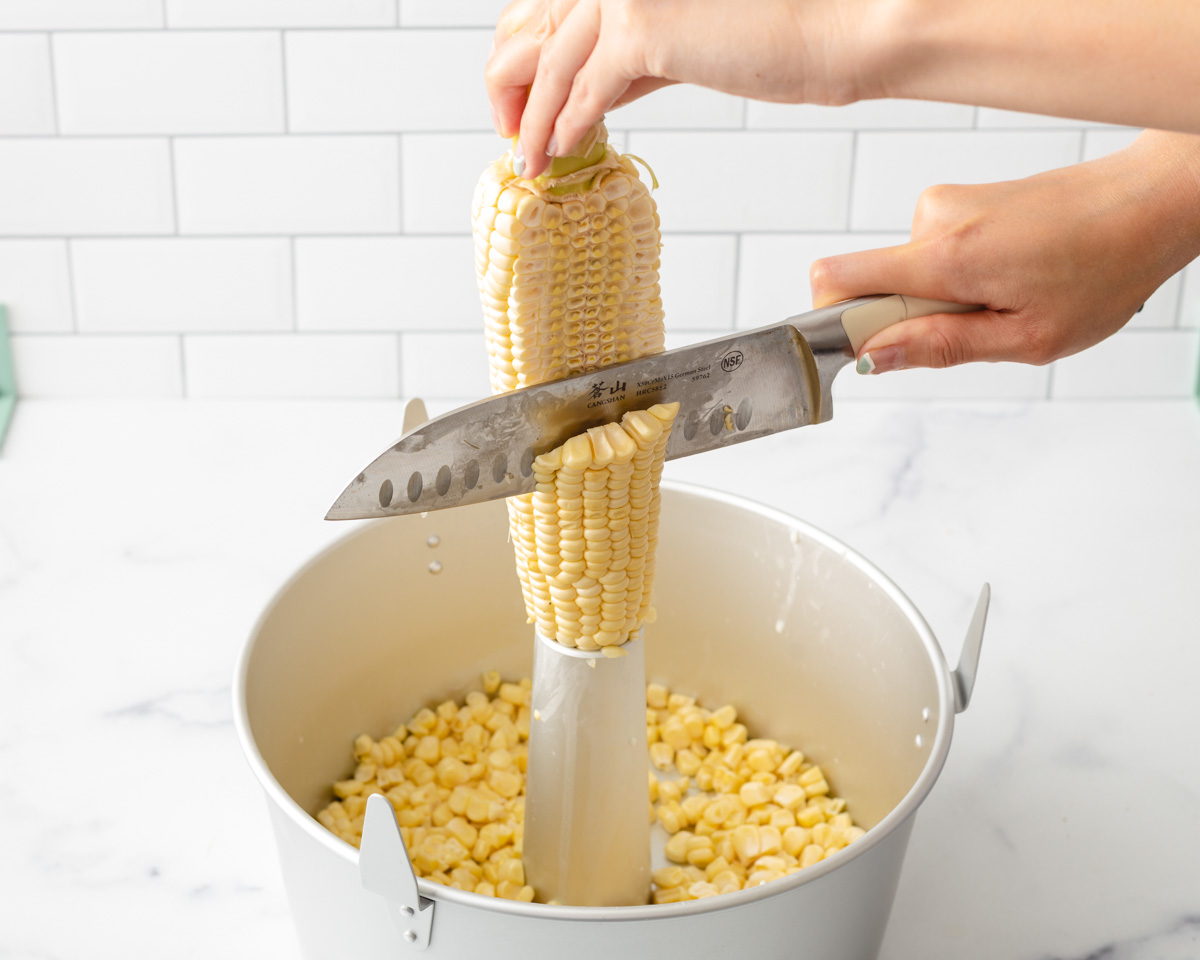
Prepare the corn (optional). Remove the husk and leaves on the corn and shave the corn kernels. Place in a large mixing bowl. Set aside.
Pro Tip: A bundt pan works great to shave a corn husk without making a mess.
Mix in the ingredients. Add the cayenne pepper, and kewpie mayonnaise, sugar, salt, and pepper into the corn bowl and mix well.
Thoroughly mix in all the ingredients to provide an even flavor coating of the corn kernels.
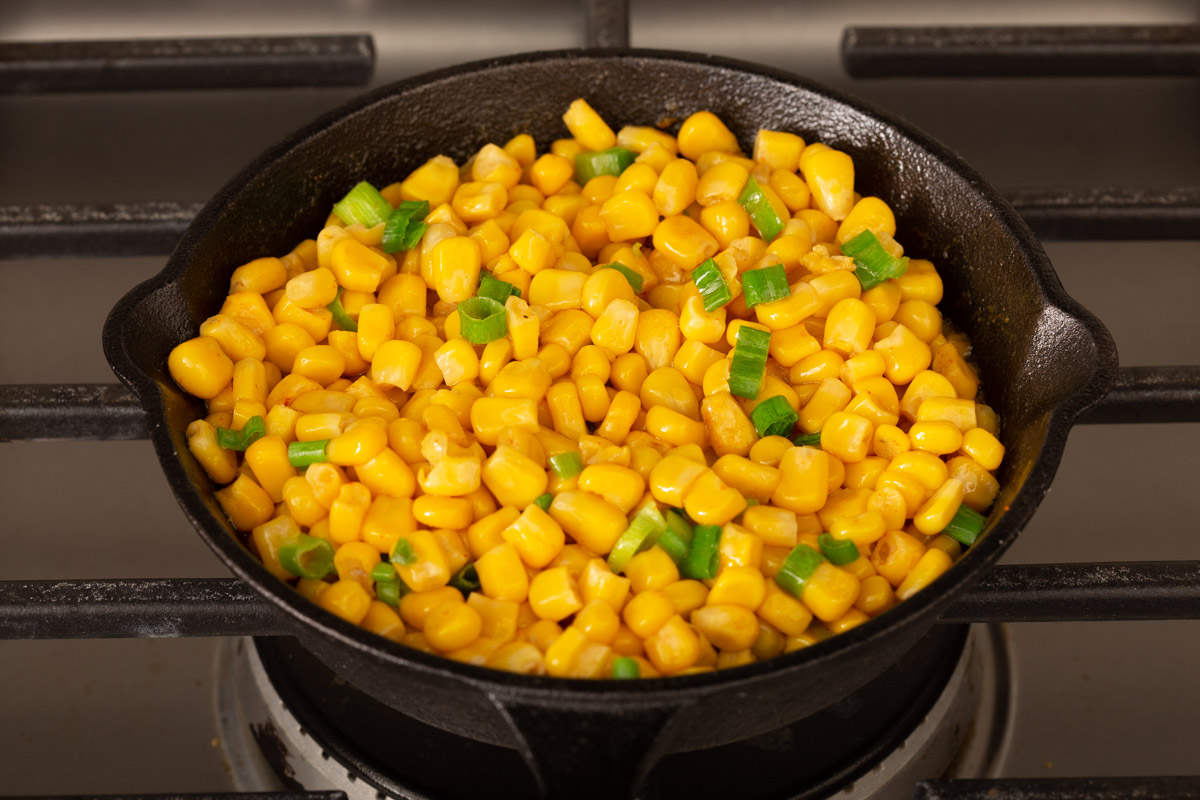
Melt the butter and cook the corn mixture. Melt the butter on a cast-iron skillet or medium skillet on medium heat. Add the corn mixture and mix well. Cook for about 5-7 minutes or until the corn has softened.
Add the green onions. Remove the cast iron from the heat and mix in the green onions.
The green onions really make the kewpie mayo and cayenne flavors pop.
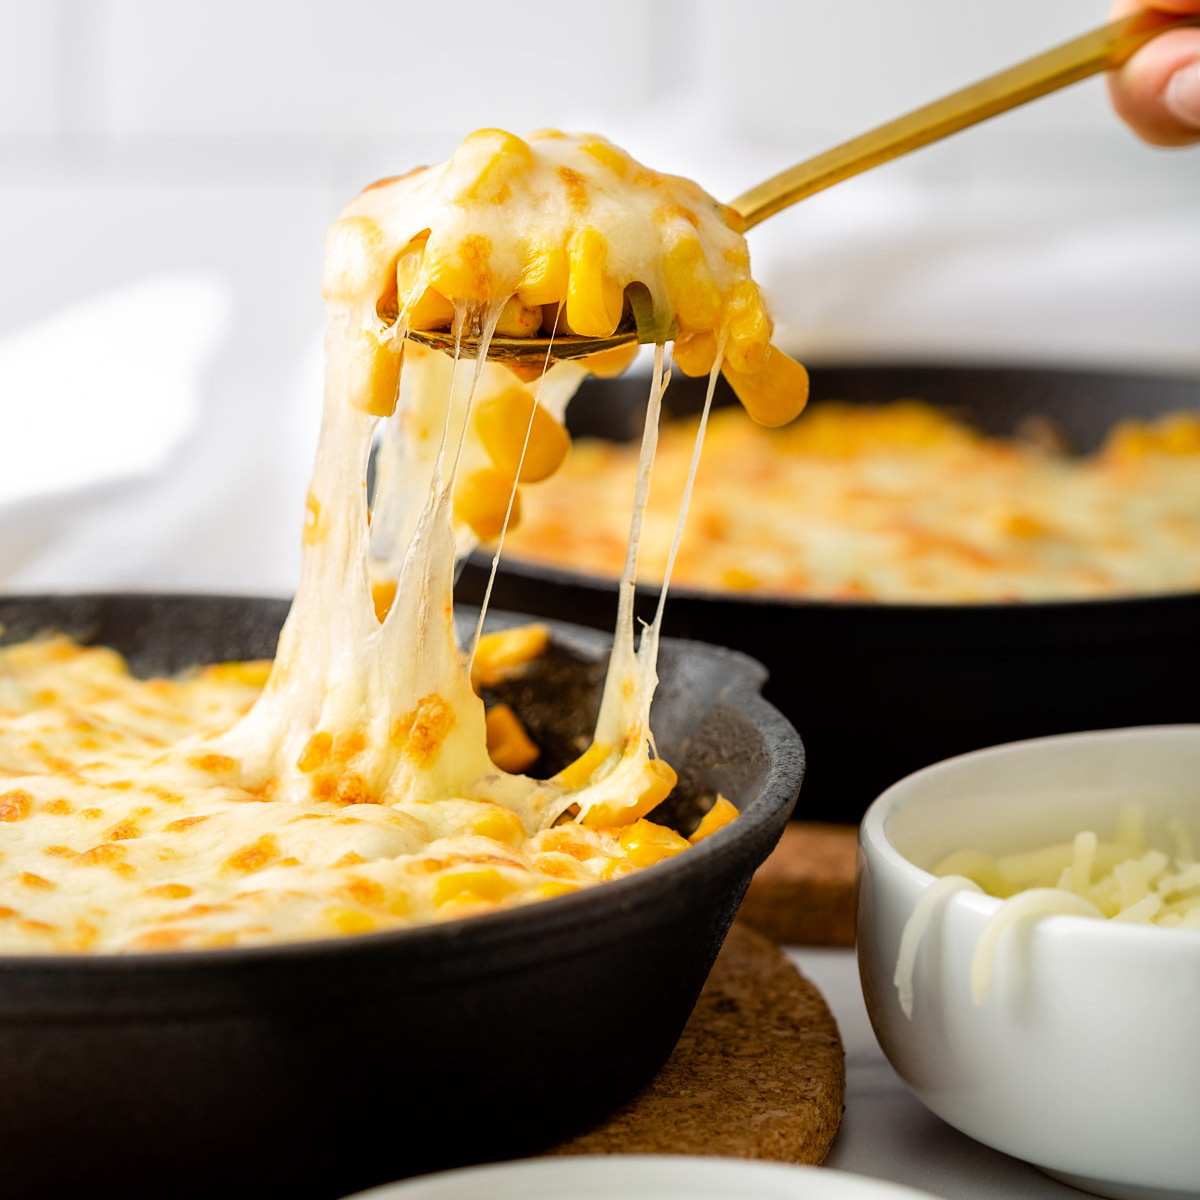
Top with mozzarella cheese and broil. Top the corn with the shredded mozzarella cheese and broil at 450˚F for 2-3 minutes until the cheese has melted and is slightly brown. (If you don’t have a cast iron you can use a baking dish to broil the corn)
Be sure to not let the cheese bake too long or it’ll quickly go from gooey to burnt.
Serve immediately. Enjoy!
Who can resist a satisfying cheese pull?!
Easy Korean Corn Cheese recipe video
[adthrive-in-post-video-player video-id=”iK9JOCcs” upload-date=”2022-12-01T20:56:16.000Z” name=”Korean Corn Cheese (Easy KBBQ banchan)” description=”An easy and delicious recipe for gooey, cheesey Korean Corn Cheese. This recipe only requires a few basic ingredients and is ready to enjoy in under 20 minutes. ” player-type=”default” override-embed=”default”]
Expert Tips
You can substitute the corn for canned corn or frozen corn. Although fresh corn will yield the best results, you cal always use canned corn if fresh corn on the cob is not available. If using canned corn, simply drain the kernels and omit the sugar. If using frozen corn, thaw the corn and drain any excess water before cooking.
Taste the corn before adding the sugar. The sugar levels are based on your own preferences. If the corn is sweet enough on its own you can reduce or omit the sugar.
Watch the Korean corn cheese closely when it is broiling. This step usually happens pretty quickly. To avoid burning the cheese, watch the corn cheese closely and remove it when the cheese is melted and slightly browned.
Storage Instructions
You can store this Korean corn cheese in an airtight container in the refrigerator for up to 1 week. You can also freeze this dish in an airtight container for up to months. To re-heat simply cover the corn and place it in the microwave.
What to pair with this dish?
This Korean appetizer goes great with the following Korean dishes:
This popular gooey Korean corn cheese appetizer is the perfect treat yourself dish. This simple and delicious recipe for Korean corn cheese is made from everyday ingredients and can be done in under 20 minutes!
Prepare the corn. If using fresh ears of corn, first remove the husk and leaves on the corn and shave the corn kernels. For canned corn, drain liquid from can. Place in a large mixing bowl. Set aside.
Mix in the ingredients. Add the cayenne pepper, and kewpie mayonnaise, sugar, salt and pepper into the corn bowl and mix well.
Melt the butter and cook the corn mixture. Melt the butter on a cast iron skillet or medium skillet on medium heat. Add the corn mixture and mix well. Cook for about 5-7 minutes or until the corn has softened.
Add the green onions. Remove the cast iron from the heat and mix in the green onions.
Top with mozzarella cheese and broil. Top the corn with the shredded mozzarella cheese and broil at 450˚F for 2-3 minutes until the cheese has melted and is slightly brown. (If you don't have a cast iron you can use a baking dish to broil the corn)
Serve immediately. Enjoy!
Video
Notes
You can substitute fresh corn on the cob for canned corn or frozen corn. Although fresh corn will yield the best results, you can always use canned corn if fresh corn on the cob is not available. If using canned corn, simply drain the kernels and omit the sugar. If using frozen corn, thaw the corn and drain any excess water before cooking.
Taste the corn before adding the sugar. The sugar levels are based on your own preferences. If the corn is sweet enough on its own you can reduce or omit the sugar.
Watch the Korean corn cheese closely when it is broiling. This step usually happens pretty quickly. To avoid burning the cheese, watch the corn cheese closely and remove it when the cheese is melted and slightly browned.
Storage Instructions: You can store this Korean corn cheese in an airtight container in the refrigerator for up to 1 week. You can also freeze this dish in an airtight container for up to months. To re-heat simply cover the corn and place it in the microwave.


I loved everything about this recipe!