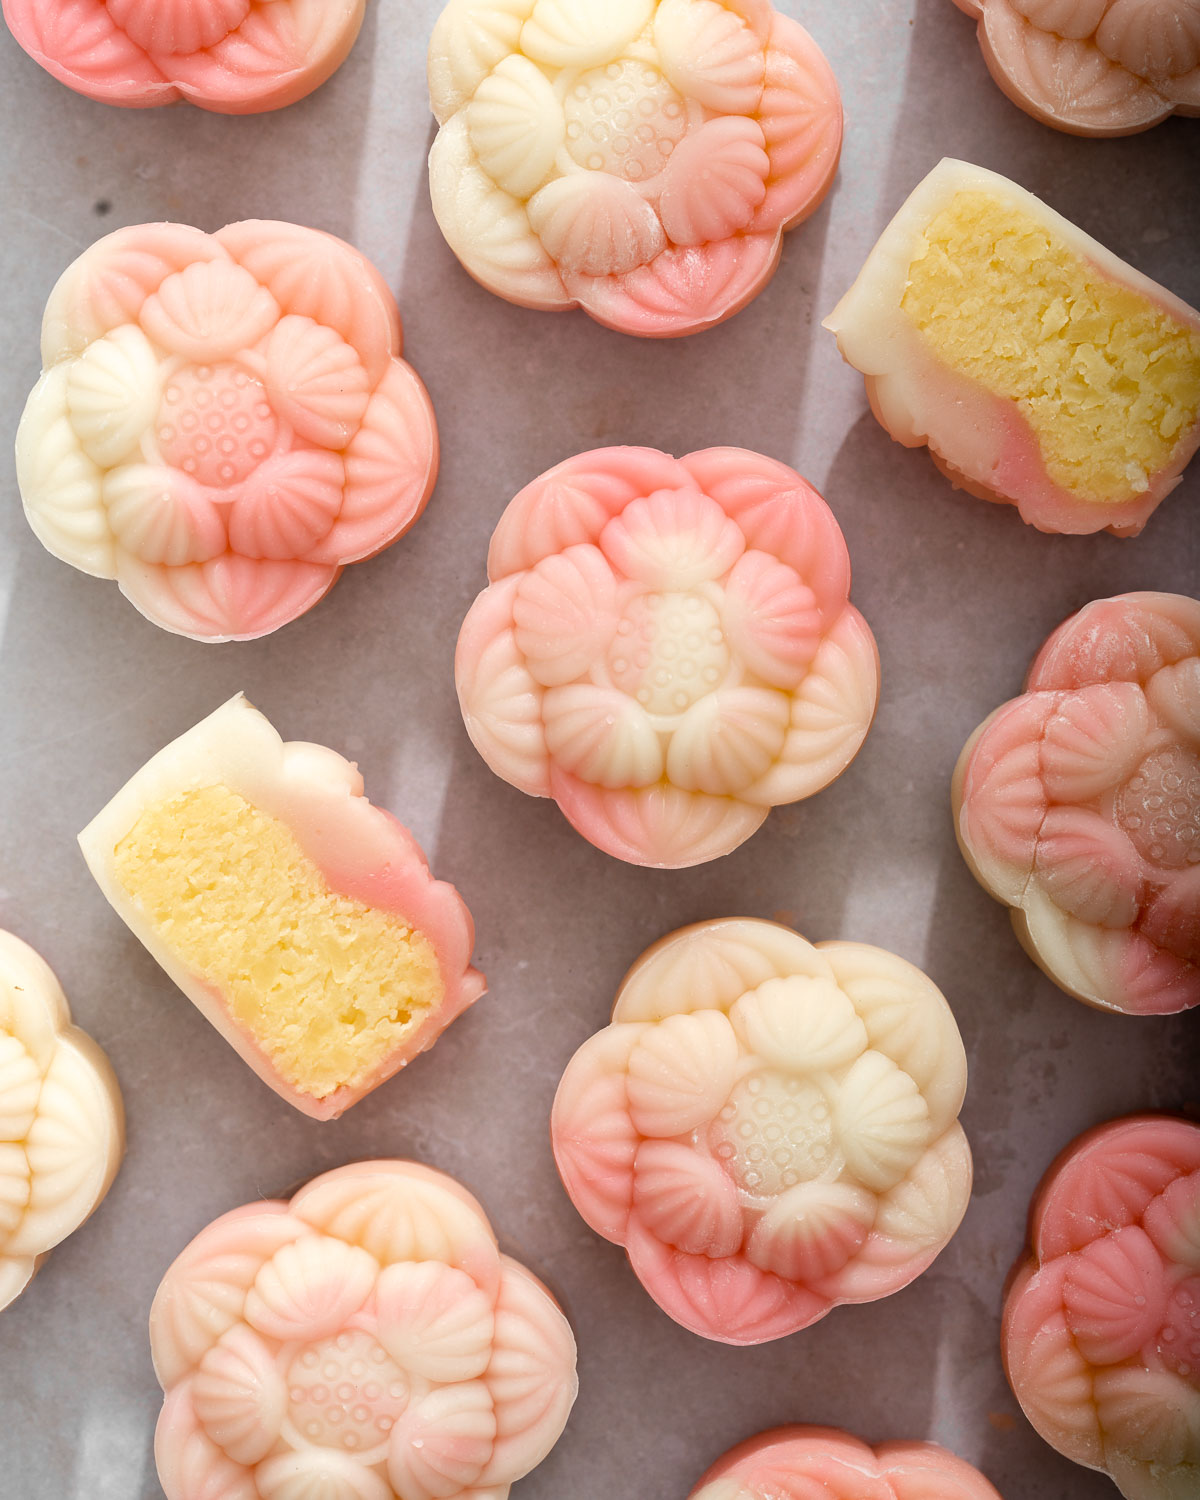
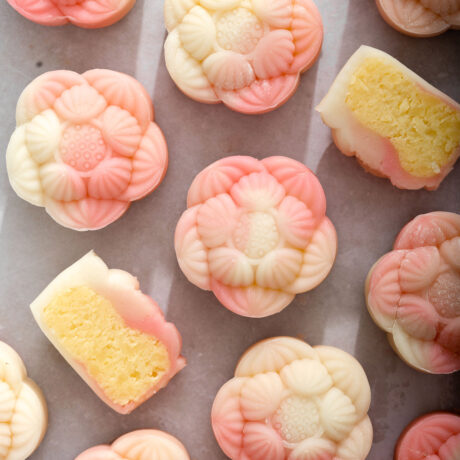
Celebrate this year’s Mid-Autumn Festival in style with these beautiful snow skin mooncakes with a vanilla custard filling! With its soft chewy exterior and delicious creamy custard filling this no-bake mooncake recipe is very easy to make at home.
This recipe for snow skin mooncake is SO much easier than making a traditional mooncake. Trust me the final delicately soft and lightly sweet homemade mooncakes are worth the time and effort.
These iconic treats are popular for Lunar New Year and most notably the Mid-Autumn Festival. The festival is held every year on the 15th day of the 8 month of the Chinese lunar calendar which typically falls from mid-September to early October. Let’s celebrate the Mid-Autumn festival with these modern and delicious no-bake snow-skin mooncakes!
I will show you step-by-step how to make this foolproof snow skin mooncake recipe. You can personalize your snow skin mooncakes by coloring them with your favorite color or even alternative fillings I’ve listed below.
This snow skin mooncake recipe yields the softest and most delicate mochi texture exterior that encases a deliciously creamy, vanilla-flavored egg custard filling.
You can make this modern mochi mooncake at home, with easy-to-find ingredients and there is no baking required!
The options are endless for decorating these custard mooncakes! You can choose to decorate it with any color or swap out the filling as you please.
Kitchen Equipment
This snow skin mochi mooncake requires only a few kitchen essentials. I highly recommend using a scale and food-safe gloves.
Kitchen scale: for a foolproof recipe, you will need exact measurements. The best way is to use a kitchen scale since all measuring cups can vary slightly. Also, you will use a kitchen scale to equally measure the proportions of the custard to dough ratio.
Mixing bowls: I love using my nesting glass mixing bowls for all of my baking and cooking needs. You will need them to mix the ingredients together.
Fine Mesh Sieve: the snow skin battery will be a little clumpy. Using a fine mesh sieve will help smooth the batter and prevent any flour clumps.
Saucepan: you will need a small saucepan to cook the egg custard.
Steamer: the snow skin batter will require a steamer to cook the dough.
Rolling pin: you will need a rolling pin to roll out the dough.
Food safe gloves: the snow skin batter is quite tacky. Using food-safe non-stick gloves will prevent the dough from sticking to your hands.
Mooncake molds: I used 75 g mooncake molds for this recipe, but you can use 50g or 100 g as well.
Ingredients
This custard mooncake recipe only requires a few pantry staple ingredients that can be found at your local Asian grocery store or online.
Milk Powder:milk powderadds a creamy texture to the custard without making it overly wet.
Cornstarch: used as a thickening agent for the custard. This will help the custard become a paste that is moldable into a ball.
Powdered sugar: the main sweetening component of the custard. Make sure to use powdered sugar to prevent a custard that is grainy.
Salt: a touch of salt enhances and balances the other flavors.
Milk: is the main base of the custard and snow skin mooncake dough. It adds moisture, and creaminess and helps bind the flavors together.
Egg Yolks: separating the eggs from the egg yolks will give the custard a richer flavor.
Condensed Milk: adds another creamy element and sweetness to the custard
Unsalted Butter: butter adds richness and flavor to the custard.
Vanilla extract: a touch of vanilla gives the custard and the skin a light and sweet vanilla flavor.
Rice Flour:rice flour lends a slightly chewy, stretchy texture to the snow skin dough.
Glutinous Rice Flour:glutinous rice flour adds a sticky chewy texture that is similar to the mochi and boba texture.
Wheat Starch:wheat starch acts as a thickening agent that helps stabilize the dough and make it pliable to work with.
Vegetable Oil: vegetable oil aids in making the dough pliable and less sticky when you knead the dough.
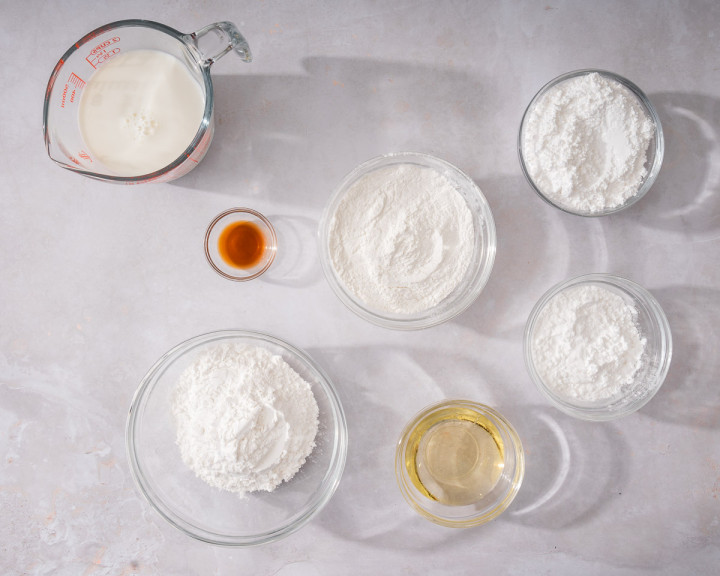
The custard ingredients.The snow skin ingredients.
Substitutions and Additions
You can personalize your very own mochi mooncake by swapping out the filling, changing the dough color, or even flavoring the dough! The world is your oyster. I’ve listed some substitutions and additions below.
Substitutions
Cornstarch: if you do not have wheat starch, you can substitute it for cornstarch.
Red bean paste: instead of making a custard filling, you can opt for a pre-made red bean paste filling instead.
Pineapple jam: you can also swap out the filling with a homemade pineapple jam from this pineapple tart recipe.
Lotus Seed paste: lotus seed paste is also a very common filling that you can make at home or buy pre-made.
Additions
Freeze-driedflavored powder: you can use pulverized blueberry, raspberry, purple yam, taro, or strawberry powder for more flavor to your snow skin
Matcha powder: if you want a subtle matcha flavor + beautiful natural green coloring
How to Make Snow Skin Mooncakes
You can make these easy custard mooncakes at home that will immediately wow all of your friends and family!
Custard filling
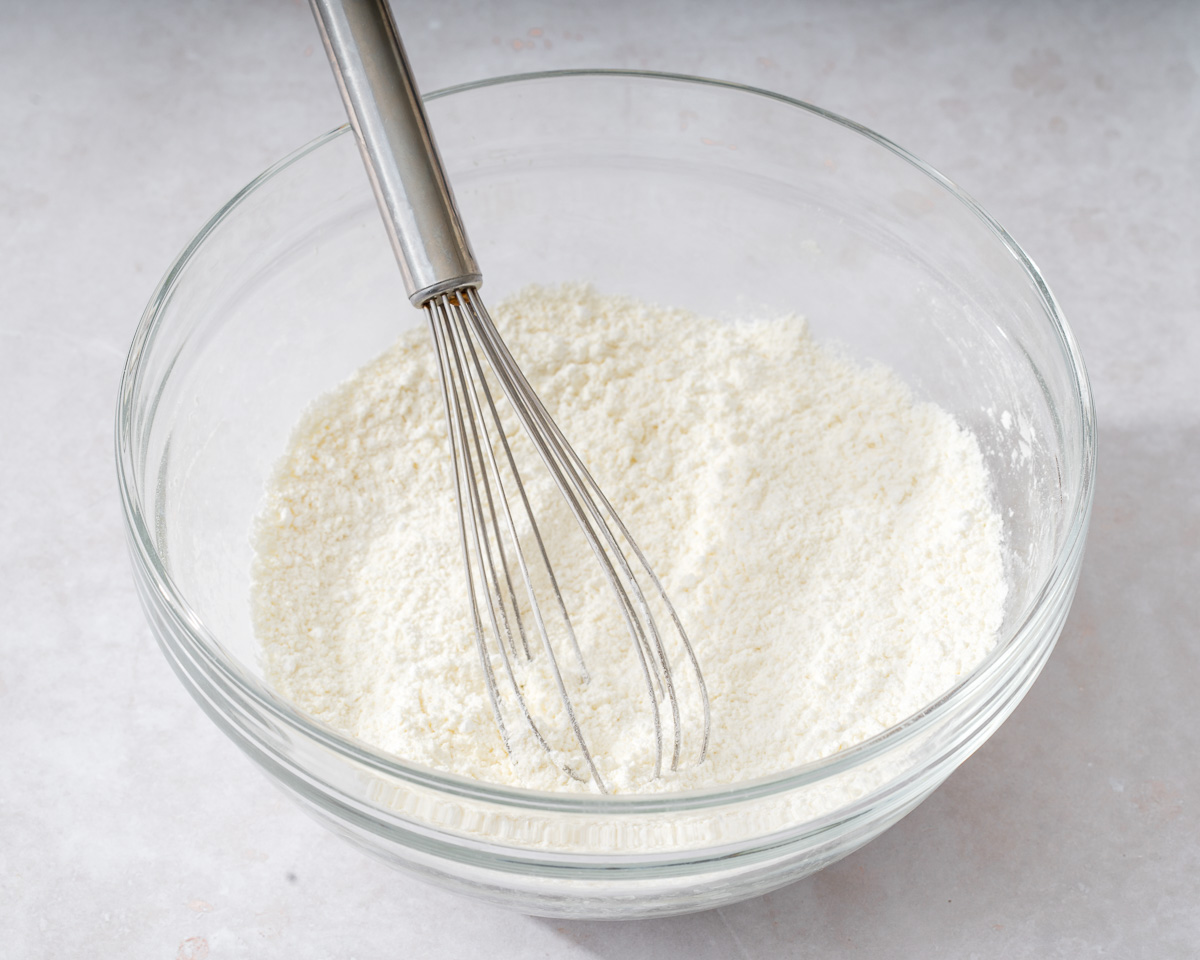
Mix the dry ingredients. In a medium mixing bowl, add the milk powder, cornstarch, sugar, and salt. Whisk to combine.
Mix the wet ingredients. In a separate mixing bowl, mix together the milk, egg yolks, and condensed milk. Mix until combined.
Combine. Add the wet ingredients into the dry ingredients and mix until combined.
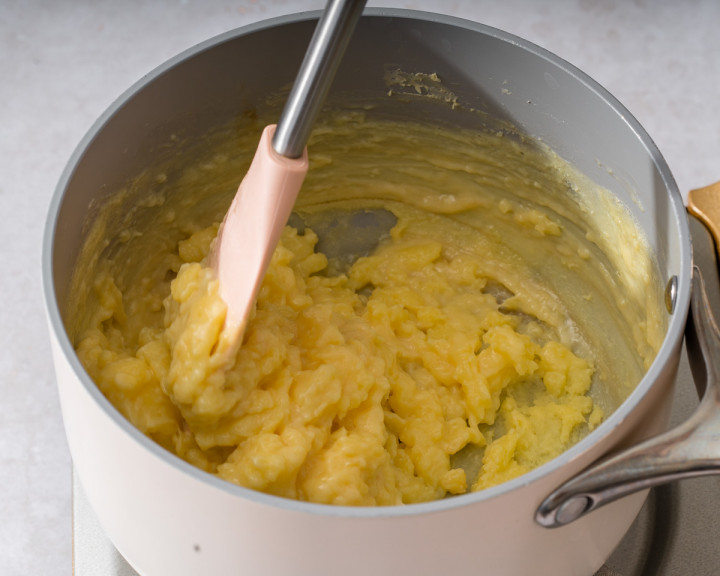
Heat the custard. Pour the custard mixture into a small saucepan over medium heat and continually mix until the mixture thickens about 5 minutes.
Add the butter and vanilla. Once the mixture has thickened slightly, add the butter and vanilla. Mix and fold with a rubber spatula until the mixture turns into a solid paste. Remove the custard from the heat when it is solid, holds its shape, and is not too clumpy.
Cover and chill. Place the custard in a shallow bowl, press the plastic wrap against the custard to prevent skin from forming, and chill in the refrigerator for about 1 hour or in the freezer for 20 minutes.
Divide. Once the custard has chilled, divide and roll the custard into about 25g balls for a 50g mold, 37 g balls for 75 g mold, or 50g for a 100 g mold. Cover and chill the custard balls in the refrigerator until it the skin is ready to be assembled.
Snow Skin
Sift the dry ingredients. In a large mixing bowl, sift the rice flour, glutinous rice flour, wheat starch, and powdered sugar. Whisk until combined.
Mix wet ingredients. In a separate mixing bowl, add the milk, vegetable oil, and vanilla. Mix until combined.
Combine. Make a well in the center of the dry mixture. Next, add about 2-3 tablespoons of the milk mixture at a time. Mix until the milk is fully incorporated. Repeat the process until all the milk mixture is combined. The batter will be thin and runny.
Strain. Strain the batter through a fine mesh sieve into a bowl that can fit inside your steamer to remove any remaining clumps.
Steam. Prepare your steamer by filling it with enough water and cook until it reaches a boil. Steam the snow skin batter on medium-high heat for 18-20 minutes until the batter is cooked. The batter is cooked if you insert a spoon in the middle and the spoon comes out clean and the dough feels stiff. Remove the bowl from the steamer and let it cool for 5 minutes.
Knead. Wearing food-safe gloves to prevent sticking, knead the dough with your hands on a clean work surface until it forms a dough about 5 minutes or so.
Chill. Shape the dough into a bowl and wrap it in plastic wrap. Then chill in the refrigerator for at least 30 minutes. The dough can last up to 2 hours.
Assembly
Color the skin. Divide the dough and knead in your desired food coloring or flavoring. I divided my dough into 3 pieces and dyed it light pink, darker pink, and white.
Divide the dough. Combine and roll the colored dough into one large ball. The ideal dough-to-filling ratio is 1:1. For example, in a 50 g mold, you’ll need 25 g dough + 25 g filling, a 75 g mold= 37 g dough + 37 g filling, and a 100 g mold=50 g dough + 50 g filling.
Roll and fill. Next, place the dough onto a clean working surface. Roll the dough into a thin even disc about 4 inches. Next, place the custard in the center and wrap the skin around and pinch to close. Dust each ball with a thin layer of cornstarch. View these last steps in the video below.
Mold. Dust the inside of the mooncake mold with a thin layer of cornstarch. Place the ball into your mold and then firmly press the mold down and hold it for at least 10-15 seconds. Then push the lever to release the snow skin mochi mooncake. Repeat with the remaining balls.
Serve. You can serve the custard mooncake as is or chill it in the refrigerator in an airtight container for at least one hour to set.
Tips for the Best Snow Skin Mooncakes
Knead the dough until smooth. There is enough oil in this recipe that will yield a smooth round snow skin dough that is easy to work with. It may be sticky at first but the more you knead the dough the smoother and more pliable it will become.
Use food-safe gloves when kneading. When you first begin to knead the dough, it may be sticky and stick to your hands. I used food-safe disposable gloves which made kneading a lot easier.
Use a scale to measure the dough-to-filling ratio. The ideal proportions for these snow-skin mooncakes are a 1:1 ratio of dough to filling. This is an easy rule of thumb to remember if you are using different mold sizes. For example, if you are using a 50 g mold, you will need 25 g of dough and 25 g of filling.
Lightly dust the outside of the custard mooncake and mooncake mold with cornstarch. This will ensure that the sticky mochi mooncake will not get stuck in the mold. Make sure to shake off any excess flour to prevent the mooncake from tasting too powdery.
Hold the base of the mold firmly. When you are molding the mooncakes, make sure to use both hands to firmly hold the mold down on your work surface. This will prevent the snow skin mochi mooncake from oozing out of the mold.
Storage Instructions
These custard mooncakes are best served on the same day you make them.
You can store these snow-skin mooncakes in an airtight container in the refrigerator for up to 3-4 days. To serve, bring the mooncakes to room temperature. If you eat chilled mooncakes, the skin’s texture may be stiff.
You can also freeze these mooncakes individually wrapped in a freezer-safe container for up to a month. But you must thaw them in the refrigerator overnight before eating.
Frequently Asked Q’s & A’s
What is snow skin mooncake?
Snow skin mooncake, snowy mooncake, ice skin mooncake, or crystal mooncake is a no-bake mooncake. The snow skin mooncake emerged in the 1960s from a bakery in Hong Kong. They were a healthier, less oily alternative to the traditional mooncake. They are made with glutinous rice flour and have a similar texture to mochi.
What is the difference between snow skin mooncakes and traditional mooncakes?
Snow skin mochi mooncakes have a soft, chewy texture. They are made by steaming the dough and can be colored using food coloring. They have about a 1-week shelf life because the skin will dry out over time. Traditional mooncakes are made with golden syrup and have a thick, tender pastry skin, and typically contain a whole salted egg yolk filling. They are baked and packaged mooncakes can have a shelf life of almost a year.
What size mooncake molds should I use?
For this recipe, I used a 75 g mold and created 14 custard mooncakes. But you can use any size molds that you prefer! If you use a 50 g mold you will yield more mooncakes and if you use a 100 g mold, you will have less. Just remember that each mooncake has a 1:1 ratio of dough to filling.
Celebrate this year’s Mid-Autumn Festival in style with these beautiful snow skin mooncakes with a vanilla custard filling! With its soft chewy exterior and delicious creamy custard filling this no-bake mooncake recipe is very easy to make at home.
Mix the dry ingredients. In a medium mixing bowl, add the milk powder, cornstarch, powdered sugar, and salt. Whisk to combine.
Mix the wet ingredients. In a separate mixing bowl, mix together the milk, egg yolks, and condensed milk. Mix until combine.
Combine. Add the wet ingredients into the dry ingredients and mix until combined.
Heat the custard. Pour the custard mixture into a small saucepan over medium heat and continually mix until the mixture thickens about 5 minutes.
Add the butter and vanilla. Once the mixture has thickened slightly, add the butter and vanilla. Mix and fold with a rubber spatula until the mixture turns into a solid paste. Remove the custard from the heat when it is solid, holds its shape and is not too clumpy.
Cover and chill. Place the custard in a shallow bowl, press the plastic wrap against the custard to prevent skin from forming, and chill in the refrigerator for about 1 hour or in the freezer for 20 minutes.
Divide. Once the custard has chilled, divide and roll the custard into about 25g balls for a 50g mold, 37 g balls for 75 g mold, or 50g for a 100 g mold. Cover and chill the custard balls in the refrigerator until it the skin is ready to be assembled.
Snow Skin
Sift the dry ingredients. In a large mixing bowl, sift the rice flour, glutinous rice flour, wheat starch, and powdered sugar. Whisk until combined.
Mix wet ingredients. In a separate mixing bowl, add the milk, vegetable oil, and vanilla. Mix until combined.
Combine. Make a well in the center of the dry mixture. Next, add about 2-3 tablespoons of the milk mixture at a time. Mix until the milk is fully incorporated. Repeat the process until all the milk mixture is combined. The batter will be thin and runny.
Strain. Strain the batter through a fine mesh sieve into a bowl that can fit inside your steamer to remove any remaining clumps.
Steam. Prepare your steamer by filling it with enough water and cook until it reaches a boil. Steam the snow skin batter on medium high heat for 18-20 minutes until the batter is cooked. The batter is cooked if you insert a spoon in the middle and the spoon comes out clean and the dough feels stiff. Remove the bowl from the steamer and let it cool for 5 minutes.
Knead. Wearing food safe gloves to prevent sticking, knead the dough with your hands on a clean work surface until it forms a dough about 5 minutes or so.
Chill. Shape the dough into a bowl and wrap it in plastic wrap. Then chill in the refrigerator for at least 30 minutes. The dough can last up to 2 hours.
Assembly
Color the skin. Divide the dough and knead in your desired food coloring or favoring. I divided my dough into 3 pieces and dyed it with a light pink, darker pink and white.
Divide the dough. Combine and roll the colored doughs into one large ball. The ideal dough to filling ratio is 1:1. For example, a 50 g mold, you’ll need 25 g dough + 25 g filling, a 75 g mold= 37 g dough + 37 g filling, a 100 g mold=50 g dough + 50 g filling.
Roll and fill. Next, place the dough onto a clean working surface. Roll the dough into a thin even disc about 4 inches. Next, place the custard in the center and wrap the skin around and pinch to close. Dust each ball with a thin layer of cornstarch.
Mold. Dust the inside of the mooncake mold with a thin layer of cornstarch. Place the ball into your mold and then firmly press the mold down and hold it for at least 10-15 seconds. Then push the lever to release the mooncake. Repeat with the remaining balls.
Serve. You can serve the mooncake as is or chill in the refrigerator in an airtight container for at least one hour to set.
Notes
Knead the dough until smooth. There is enough oil in this recipe that will yield a smooth round snow skin dough that is easy to work with. It may be sticky at first but the more you knead the dough the smoother and more pliable it will become.
Use food-safe gloves when kneading. When you first begin to knead the dough, it may be sticky and stick to your hands. I used food-safe disposable gloves which made kneading a lot easier.
Use a scale to measure the dough-to-filling ratio. The ideal proportions for these snow-skin mooncakes are a 1:1 ratio of dough to filling. This is an easy rule of thumb to remember if you are using different mold sizes. For example, if you are using a 50 g mold, you will need 25 g of dough and 25 g of filling.
Lightly dust the outside of the custard mooncake and mooncake mold with cornstarch. This will ensure that the sticky mochi mooncake will not get stuck in the mold. Make sure to shake off any excess flour to prevent the mooncake from tasting too powdery.
Hold the base of the mold firmly. When you are molding the mooncakes, make sure to use both hands to firmly hold the mold down on your work surface. This will prevent the snow skin mochi mooncake from oozing out of the mold.


Rate & Review What did you think of this recipe?