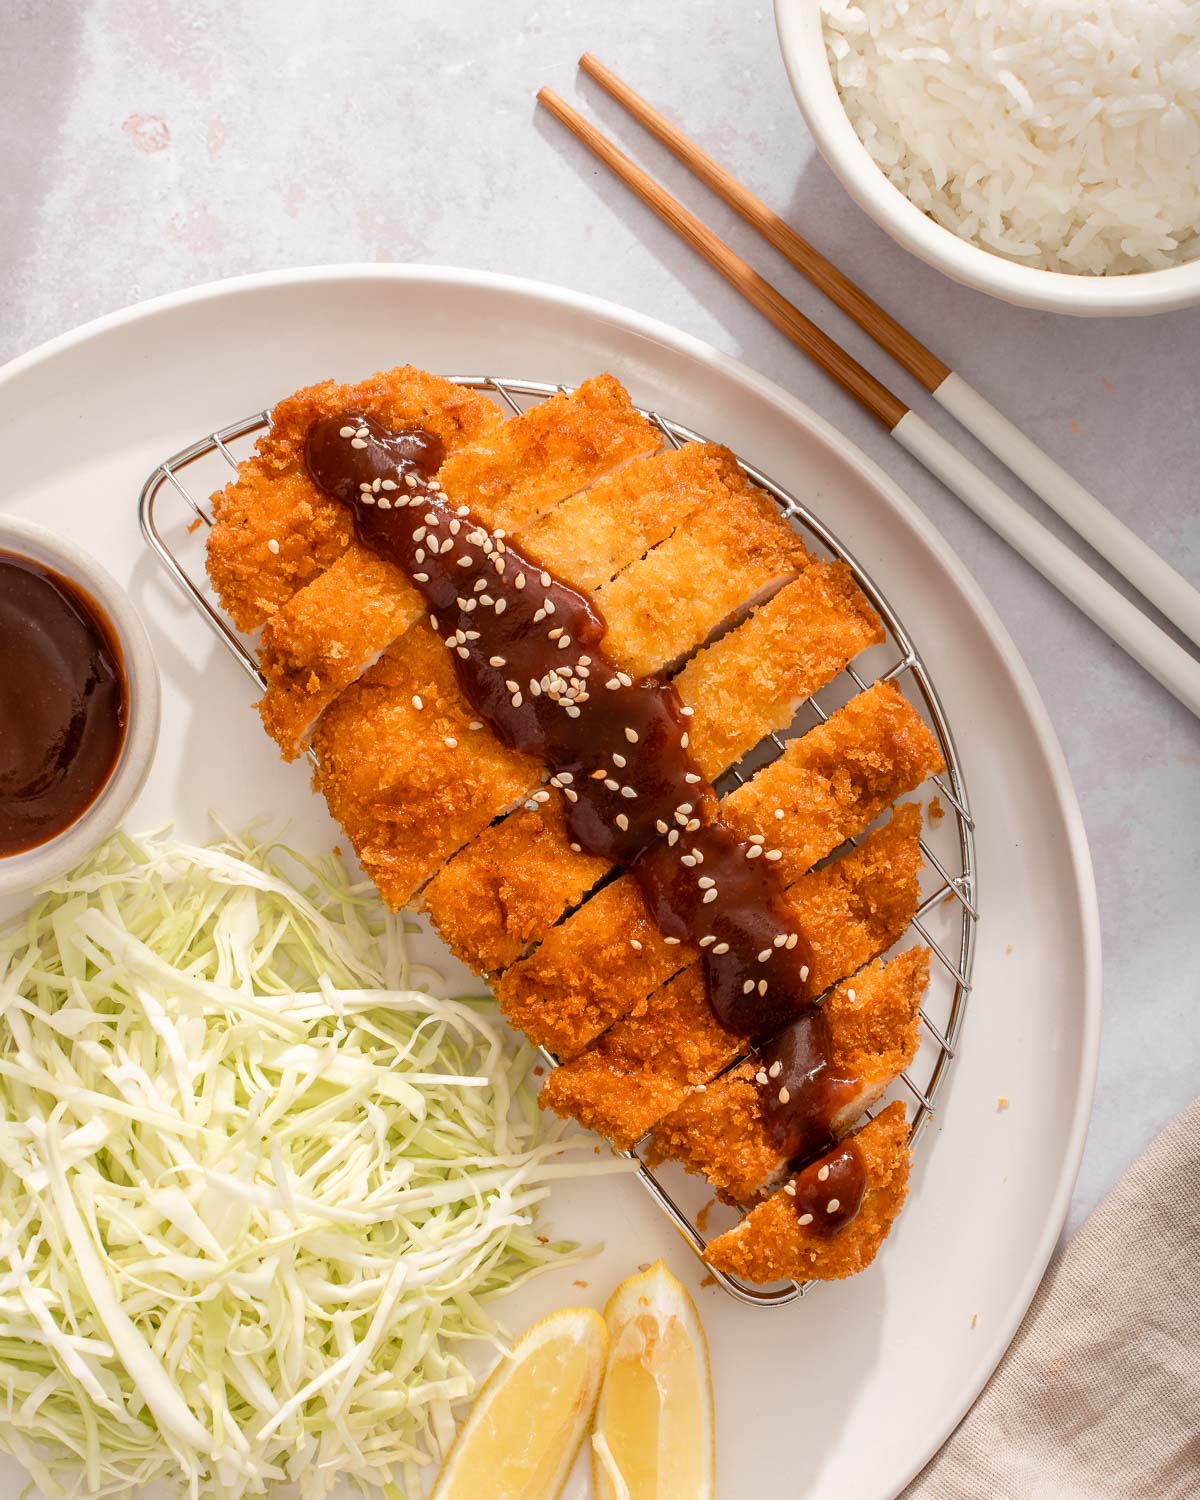
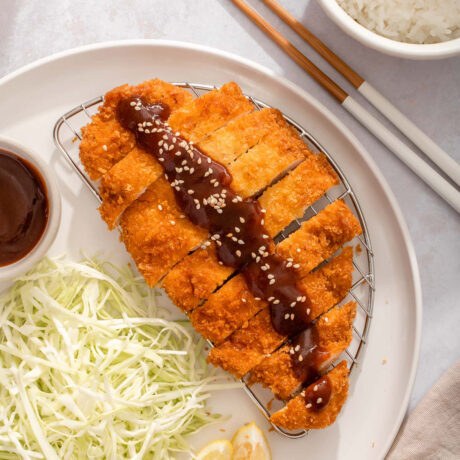
You can make this katsu chicken recipe a meal by pairing it with my homemade katsu sauce, a bowl of warm rice, and shredded cabbage. If you love katsu but are unsure of deep frying, check out my air fryer tonkatsu and air fryer chicken katsu curry recipes. What is Chicken Katsu? (Chicken Katsu vs.
What is Chicken Katsu? (Chicken Katsu vs. Tonkatsu)
This Japanese dish features a chicken cutlet breaded with panko breadcrumbs deep fried to golden perfection. Similarly, Tonkatsu, a pork version, uses a thick cut of breaded pork, while katsu uses thin tenderized chicken breast. Both katsu and tonkatsu are typically served with shredded cabbage, rice, and katsu sauce.
Chicken katsu can also be found served as a Japanese katsu curry where the dipping sauce is omitted for a side of curry. Or used as a filling for sandwiches and sliders.
Ingredients
You can find all of the ingredients for this Japanese chicken cutlet recipe at your local grocery market, Asian grocery market, or online.
Boneless Skinless Chicken Breast: typically Japanese chicken katsu is made with butterflied chicken breast. Make sure to bring the chicken breast to room temperature before frying.
Salt and Pepper: to season the chicken breast
All-Purpose Flour: the flour absorbs any surface moisture of the chicken. Regular all-purpose flour works best.
Egg: the egg binds the flour and panko to the chicken creating that beautiful crispy crust.
Panko Breadcrumbs:panko breadcrumbs are Japanese breadcrumbs that are lighter and crispier than regular breadcrumbs. They are dryer and flakier which allows them to absorb less oil. I do not recommend substituting panko for any other breadcrumbs.
Vegetable Oil: I recommend using vegetable oil because it has a high smoke point and is neutral in flavor. Make sure you have enough vegetable oil to cover the Japanese chicken cutlet for even cooking.
Substitutions
For a traditional chicken katsu recipe, there are not very many substitutions you can make without altering the final dish.
Chicken thigh: instead of chicken breast, you can opt for boneless skinless chicken thighs as well.
Neutral Oil: canola or peanut oil also make good alternatives to vegetable oil.
Instructions
Making this easy under 20-minute chicken katsu recipe will be the most satisfying meal you make all week!
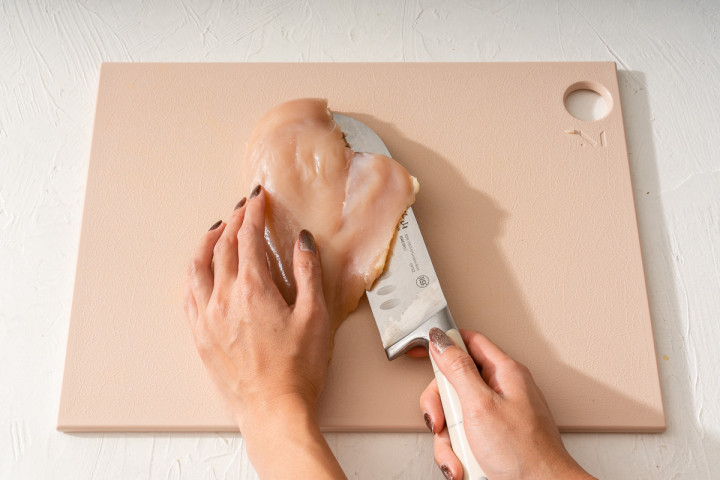
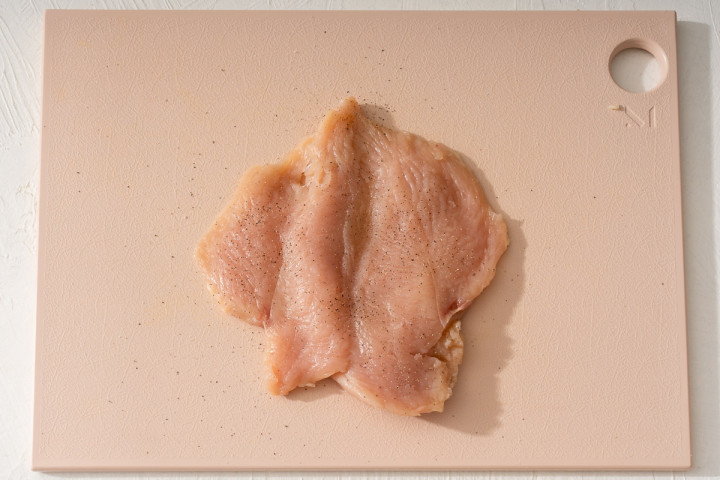
Butterfly the chicken. Butterfly the chicken by slicing the breast horizontally along the long side of the chicken from one side leaving the other intact.
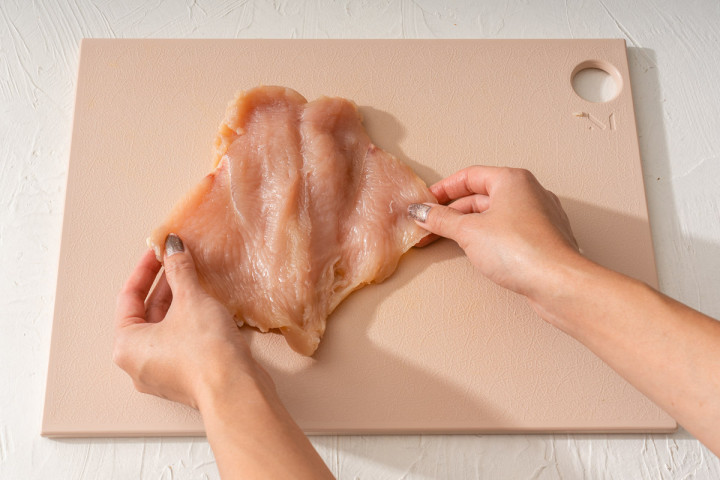
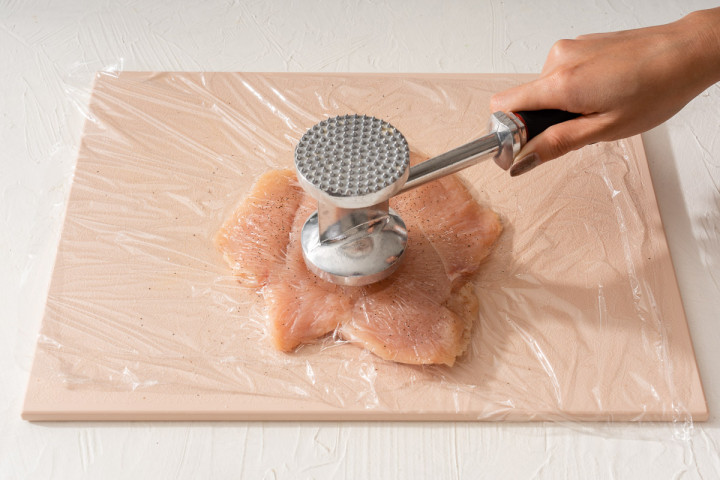
Tenderize and season the chicken. Fold out the chicken, and lightly pound the chicken to tenderize until it is about 1/2 inch thick then season both sides with salt and pepper.
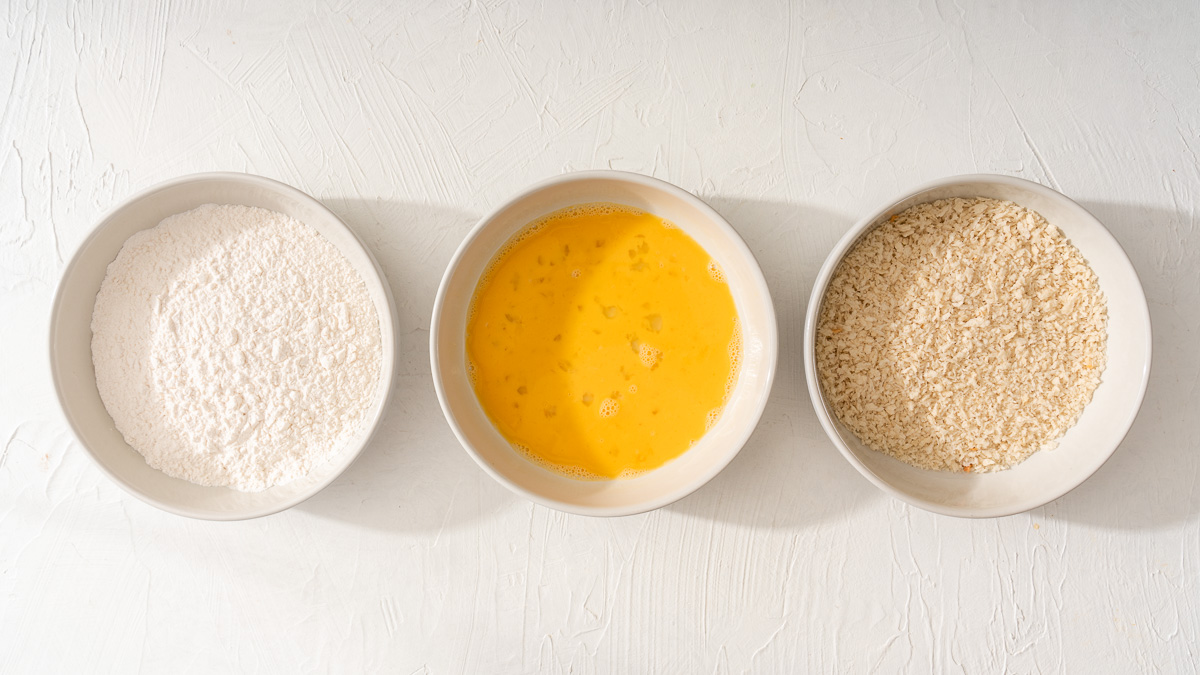
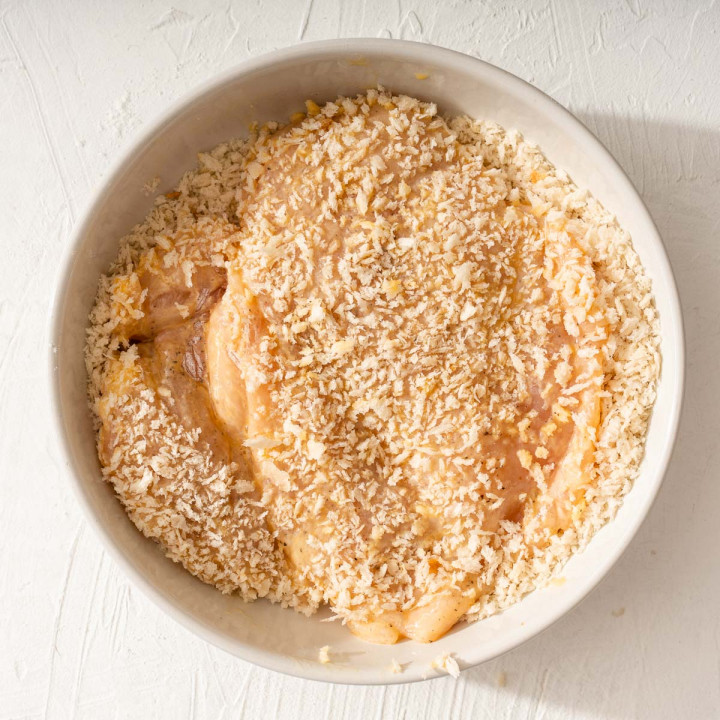
Prepare the breading. Prepare three shallow dishes, 1) with flour, 2) with the lightly beaten egg and 3) with panko bread crumbs.
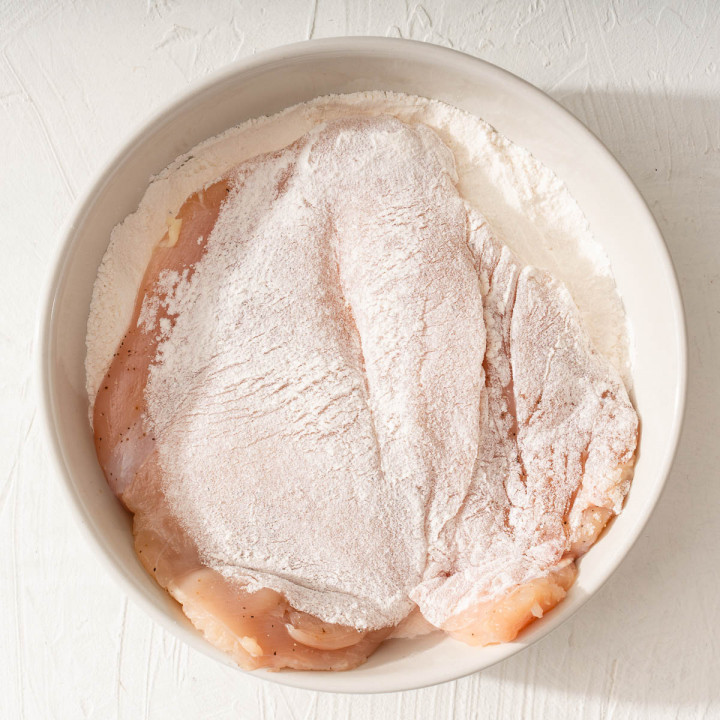
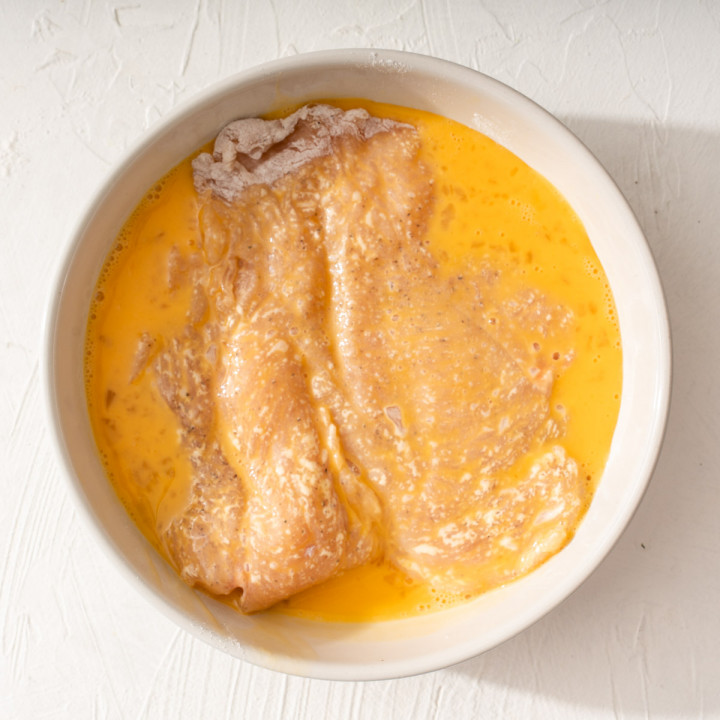
Coat the chicken. Thoroughly coat the chicken with flour, then the beaten eggs, and lastly the panko bread crumbs. Ensure that each side is thoroughly coated and shake off any excess each time.
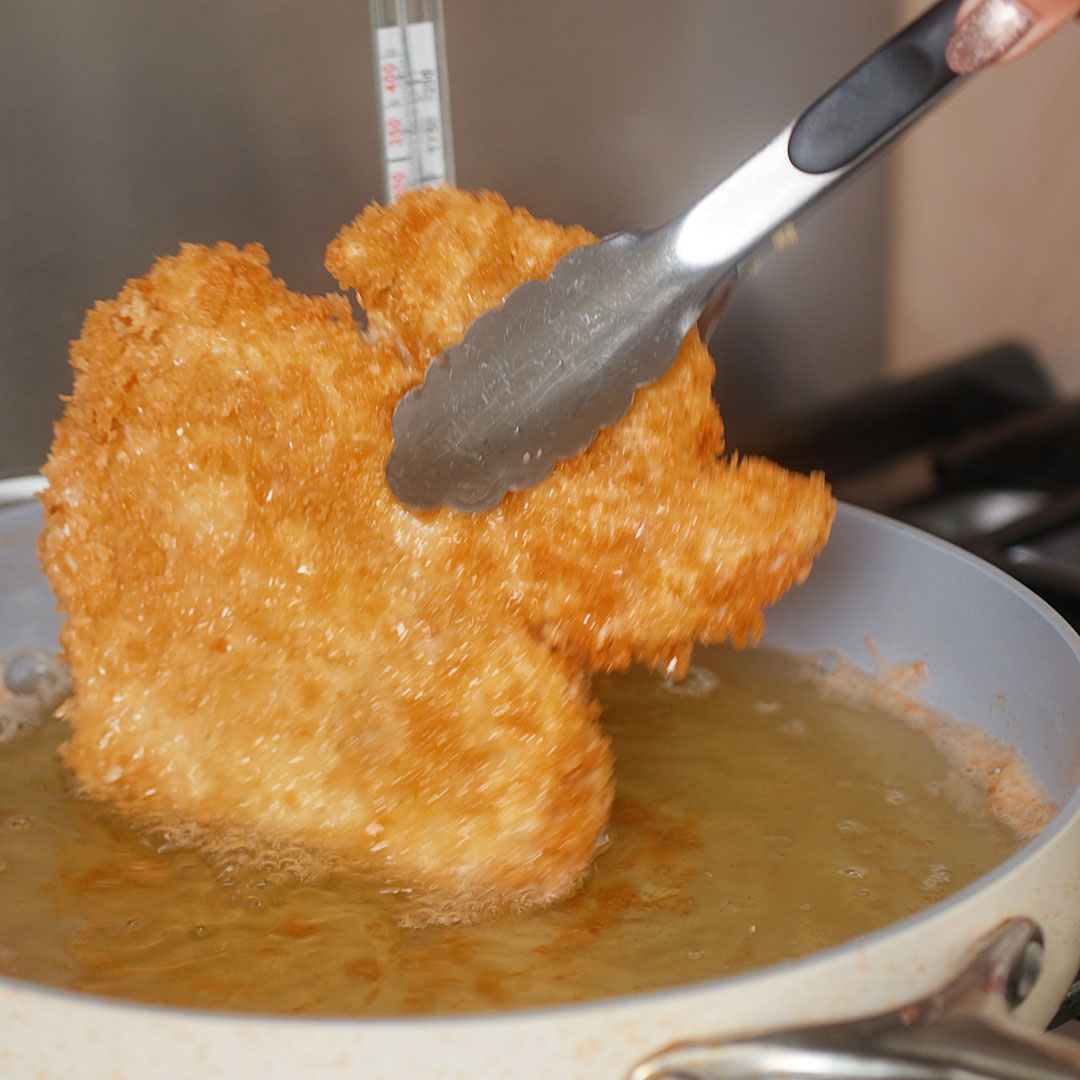
Fry. In a medium-sized deep pan, heat up about 1-2 inches of vegetable or any neutral oil over medium-high heat until it reaches 340°F or 170°C. Place one coated chicken katsu into the oil and cook for 3 minutes before flipping and cooking for another 3-4 minutes. Cook the chicken until golden brown.
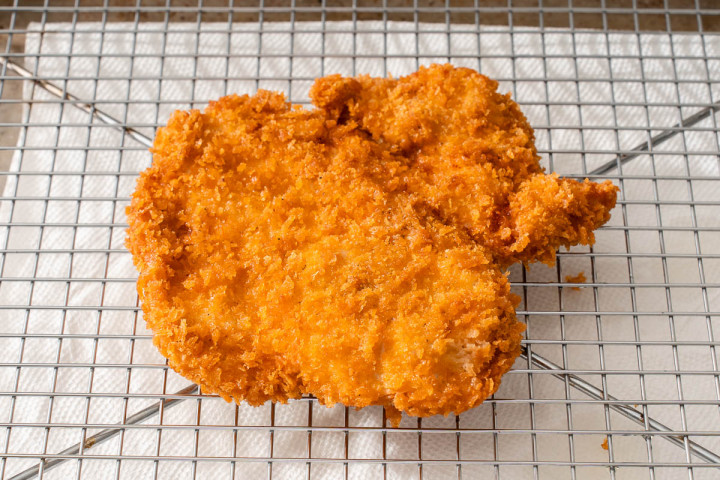
Serve. Let the chicken cool slightly on a wire rack before slicing it into strips. Serve with rice, shredded cabbage, and katsu sauce. Enjoy!
Expert Tips for Crispy Chicken Katsu
Tenderize your chicken! This ensures even cooking time for your chicken. Tenderizing the chicken creates an even thickness throughout your chicken breast and yields more tender, juicer, and tastier meat.
Bring your chicken breast to room temperature. About 30 minutes before cooking the chicken cutlet, I recommend taking the chicken out of the refrigerator and bringing the chicken to room temperature so that the chicken can cook more evenly.
Dust off excess flour and panko. When breading the chicken breast, firmly press the flour and panko breadcrumbs onto the chicken to thoroughly coat it. Then lift the chicken and shake off any excess to prevent the breading from falling off when you fry the chicken.
Use a candy thermometer to monitor the oil temperature. I HIGHLY recommend placing a thermometer inside your skillet to monitor the oil temperature at all times. Too hot—may burn the breading before the chicken finishes cooking. Too cold—the chicken katsu will be overly greasy and hold too much oil. The optimal oil temperature you want to maintain is 340 ºF (170 ºC).
Scoop up the fallen panko crumbs. In between each batch of katsu chicken, scoop out the dropped breadcrumbs in the oil to prevent them from burning in the oil and changing the flavor of the oil.
Cool on a wire rack. Before serving, I recommend cooling the Japanese chicken cutlet on a wire rack for at least 5 minutes so that the excess oil can drip off and prevent the crispy crust from getting soggy.
Storage Instructions
This katsu chicken recipe is best served immediately for the ultimate crunch. However, you can store any Japanese chicken cutlet leftovers in an airtight container in the refrigerator for up to 3 days. To reheat, the best way to maintain the crispy outer layer is to heat it in the oven at 350ºF (176 ºC) until warm.
FAQ
What is chicken katsu?
Chicken katsu, (チキンカツ), also known as panko chicken is a Japanese dish made with chicken breast that is breaded with flour, egg, and panko bread crumbs and then deep fried. Essentially it is the Japanese version of a chicken schnitzel or a large chicken tender.
What does katsu chicken taste like?
Katsu tastes essentially like a giant ultra-crispy chicken tender that is dipped in a tangy umami katsu sauce.
How do you serve Japanese chicken katsu?
Japanese panko chicken is typically served with tonkatsu sauce, shredded cabbage, and white rice.
This chicken katsu recipe is also very versatile and can be used as a ramen or udon topper, paired with a delicious Japanese curry, or in between a sandwich for a chicken katsu sando.
Can you freeze chicken katsu?
Yes! After you fry the Japanese chicken cutlet, let it cool completely before storing it in a freezer-safe airtight container. This Japanese panko chicken will last in the freezer for up to 3 months.
Freezing is a perfect option if you want to double or triple this katsu chicken recipe. To reheat, bake the frozen chicken katsu on a lined baking sheet in the oven at 350ºF (176 ºC) for about 15 minutes or until warm.
Butterfly the chicken. Butterfly the chicken by slicing the breast horizontally along the long side of the chicken from one side leaving the other intact.
Tenderize and season the chicken. Fold out the chicken, and lightly pound the chicken to tenderize until it is about 1/2 inch thick then season both sides with salt and pepper.
Prepare the breading. Prepare three shallow dishes, 1) with flour, 2) with the lightly beaten egg and 3) with panko bread crumbs.
Coat the chicken. Thoroughly coat both sides of the chicken with flour, then the beaten eggs, and lastly the panko bread crumbs. Shake off any excess between each step and make sure to press on the panko bread crumbs to thoroughly coat the chicken.
Fry. In a medium-sized deep pan, heat up about 1-2 inches of vegetable or any neutral oil over medium-high heat until it reaches 340°F or 170°C. Place one coated chicken katsu into the oil and cook for 3 minutes before flipping and cooking for another 3-4 minutes. Cook the chicken until golden brown.
Serve. Let the chicken cool slightly on a wire rack before slicing into strips. Serve with rice, shredded cabbage and katsu sauce. Enjoy!


This was easy to make and my toddlers loved it!!! Definitely adding this to our rotation.
It’s one of our household favorites too. So glad you enjoyed it!
I look forward to trying it. I really liked that it was for 2.
I can’t wait for you to try it 🙂